Permit Type Configuration Instructions
Last modified on:
Overview
Configure the permits available within the Permit Groups.
Prerequisites
- Access to the system's Menu and Setup tab.
Steps
Location
- Click on a Menu button.
- Select the Setup tab.
- Click on Permit Type Setup.
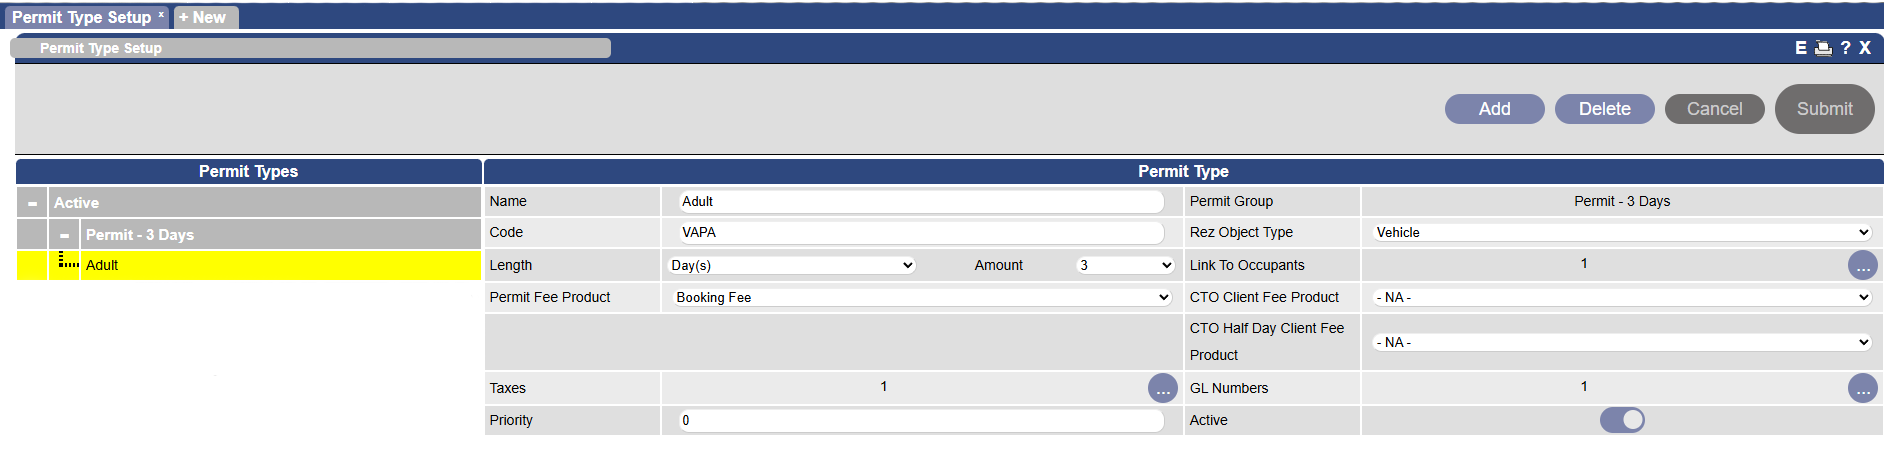
Adding a Permit Type
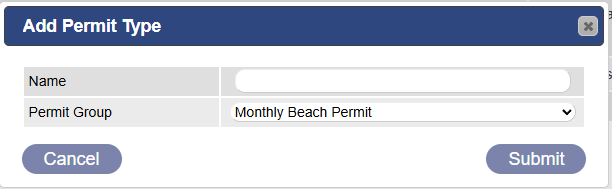
- Click Add.
- Name: Enter the name of the Permit Type (e.g., Adult).
- Permit Group: Select the Permit Group associated with the permit type.
- Click Submit.
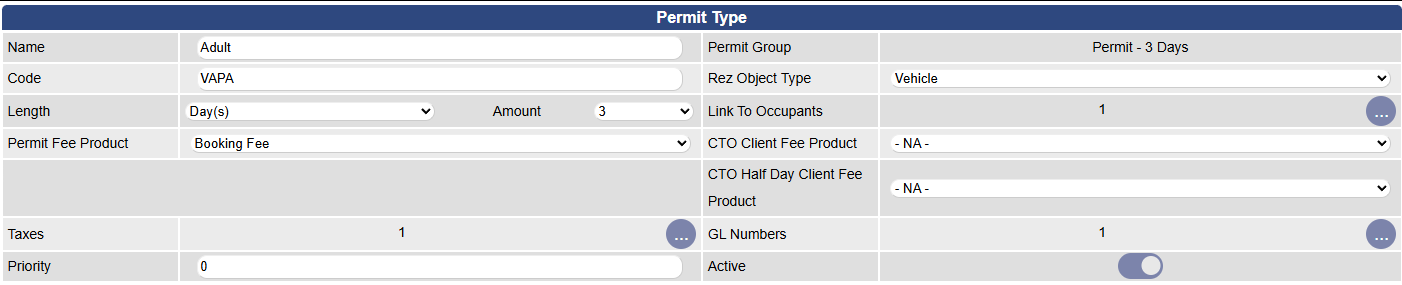
- Code: Enter the Code of Permit.
- Rez Object Type: Select the Rez Object Type associated with the permit.
- Length: Select the time period for the length of the permit (e.g., Days).
- Amount: Select the length of time (e.g., 1 for 1 Day Permit).
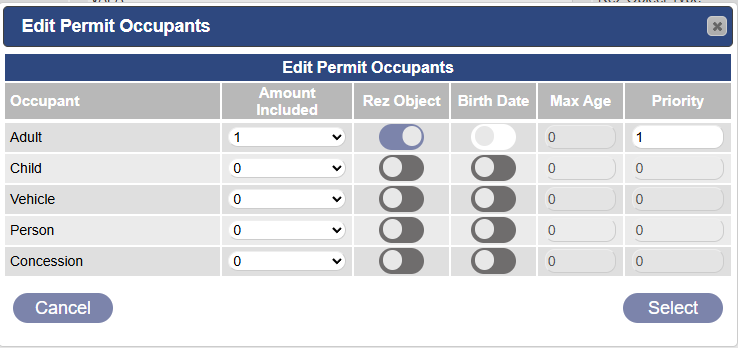
- Link To Occupants: If associated with an Occupant Type (e.g., Adult), select the required Occupant Type.
- Amount Included: Select the amount included in the permit.
- Rez Object: Select if the Rez Object Type is required to be recorded with the occupant.
- Birth Date: Select if the Birth Date is required.
- Priority: Order of Appearance.
- Permit Fee Product: If there is a permit fee/booking fee, select the product.
- Priority: Order of Appearance.
- Active:
- Activate when the permit is available for purchase.
- Deactivate when the permit is no longer available.
Permit Rates
- Permit Rates are maintained in Product Rates Setup.
- Click on a Menu button, select the Setup tab, and click on Product Rates Setup within Pricing and Rates.
- Click on the + symbol next to Permit Types to view the permits.
- Enter the permit rates for each permit.
Troubleshooting
- Ensure all fields are filled correctly to avoid errors during setup.
- Verify that the Permit Group and Rez Object Type selections are accurate to prevent configuration issues.