General Ledger Number Setup Guide
Last modified on:
Overview
Setting up GL numbers is a critical part of accounting and financial reporting. These numbers ensure that all transactions are categorized and recorded correctly in the general ledger. Below is a step-by-step guide to help you set up GL numbers effectively.
- GL = General Ledger
Useful Links:
- Location
Prerequisites
- Access to the Admin/Accounting section
- Understanding of GL numbers and their role in financial reporting
Steps
Location
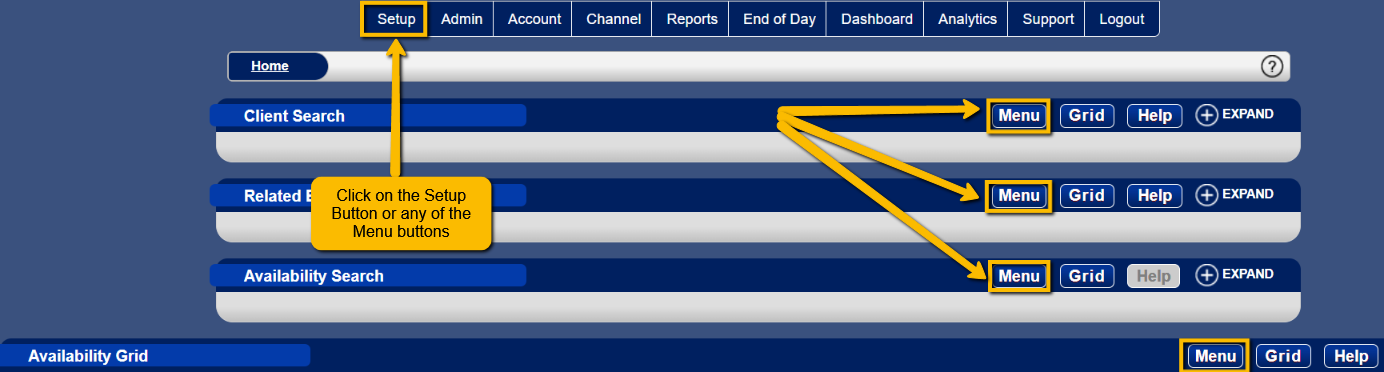
- Click on ‘Setup’ or any ‘Menu’ button.
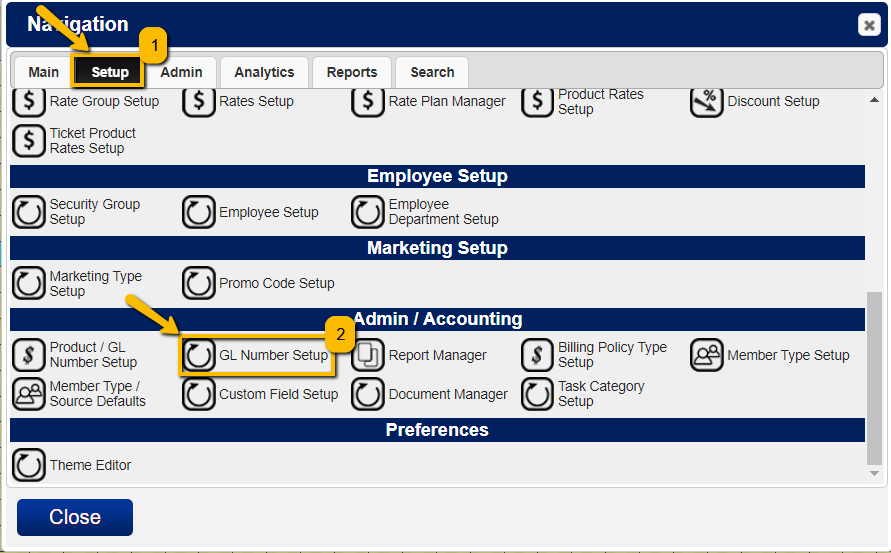
- Under ‘Admin/Accounting’ section, select ‘GL Number Setup’.
How to Add a GL Number
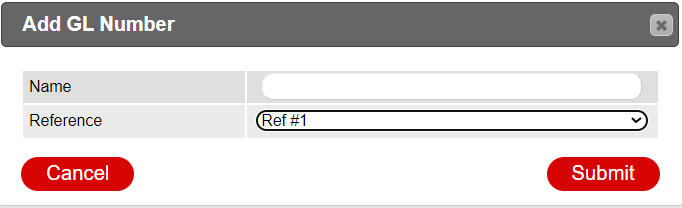
- Click Add and enter the GL #.
- Select the reference in the dropdown option.
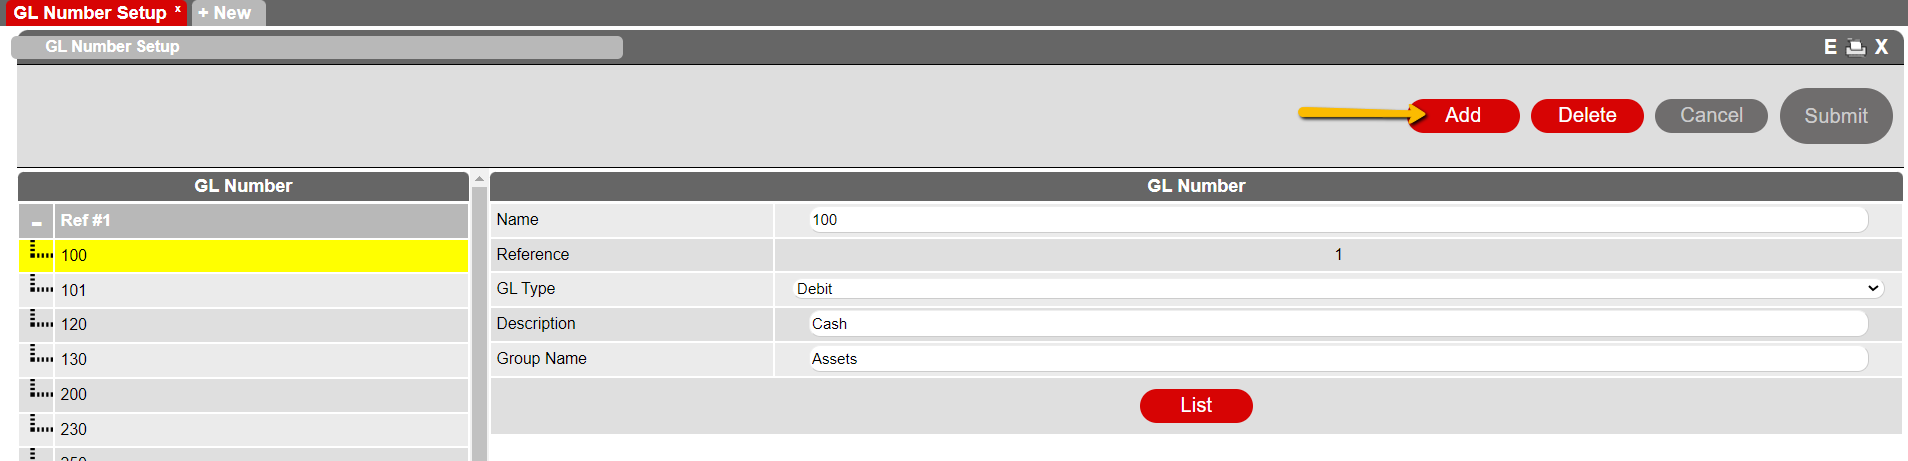
- Select ‘Debit’ or ‘Credit’ from the GL Type dropdown option.
- (Optional) Enter a Description.
- (Optional) Enter a Group Name.
- Click Submit.
Note: The List button provides all products assigned to this GL number.
How to Edit a GL Number
- Select the GL Number on the left panel.
- Make the necessary adjustments. Note that the Reference # cannot be changed.
- Click Submit.
How to Map the GLs
- Navigate to Product/GL Number Setup.
- Select the tab the GL number is going to be added to.
- Expand the desired category.
- Click the label.
- Click Add.
- Click the dropdown menu under GL Ref #1.
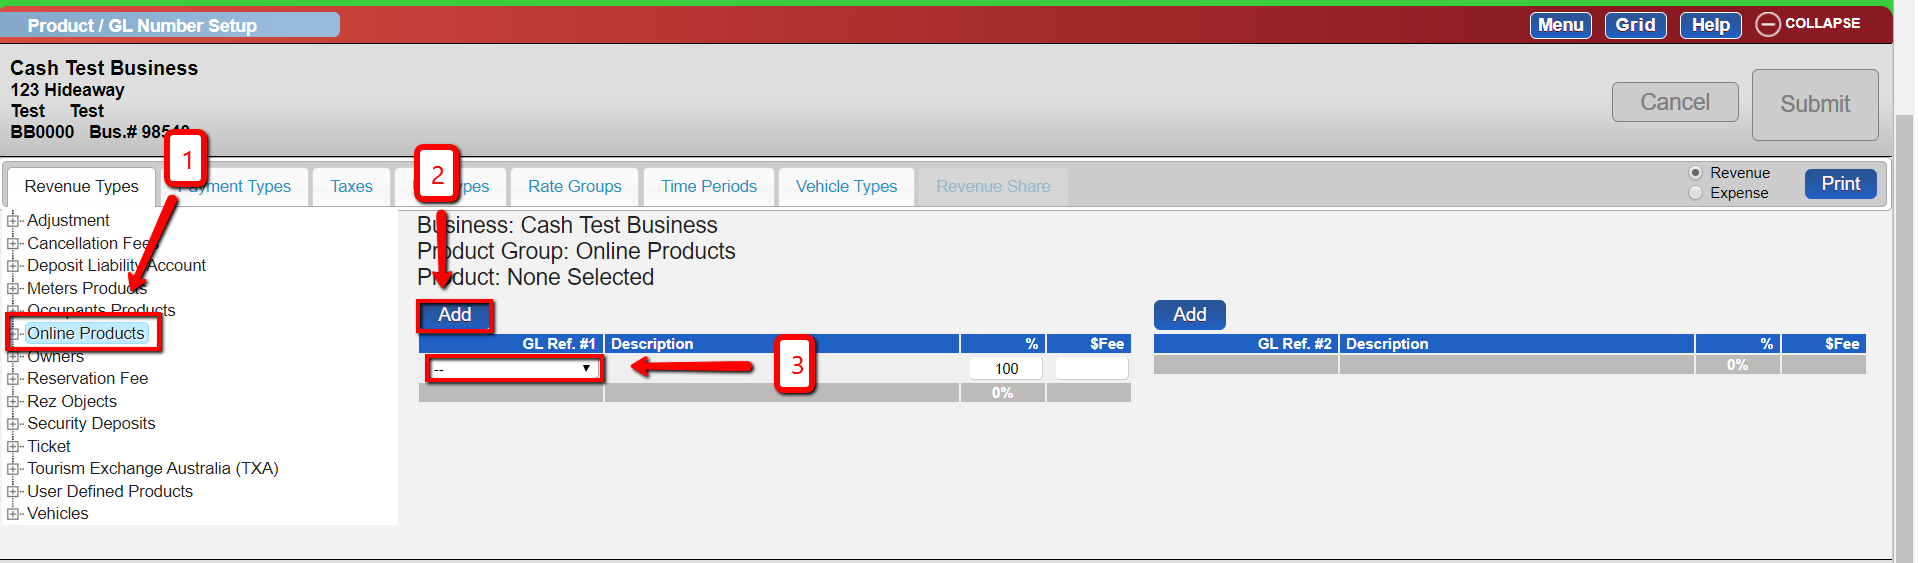
- Add a change control comment.
- Finally, click on the ‘Submit’ button.
Troubleshooting
- Ensure all fields are correctly filled out before submitting.
- Verify that the GL number does not already exist to avoid duplicates.
- If changes are not saving, check user permissions and try again.