Time Period Setup for Booking Rates
Last modified on:
Overview
Set up the time periods used for booking rates. Specify the time interval, quantity, excess period, and discount options. These settings control how time is measured and priced in the system.
Prerequisites
- Access to the system menu
- Permissions to modify setup configurations
Steps
Location
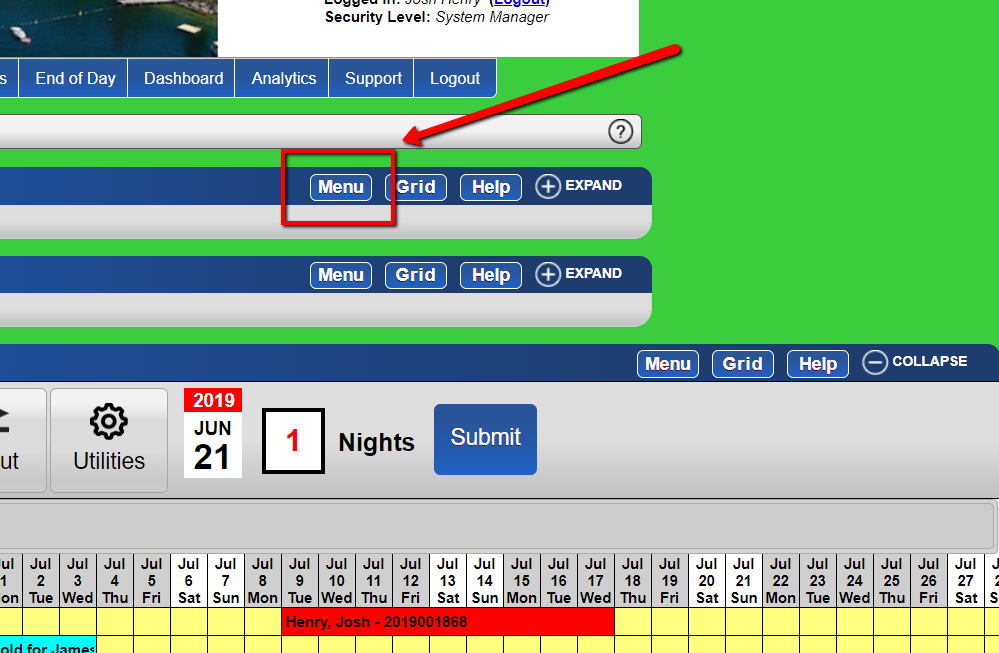
- Navigate to Menu.
- Select Setup.
- Choose Time Period Setup under Business Setup.
Adding New Time Periods
- Click the Add button.
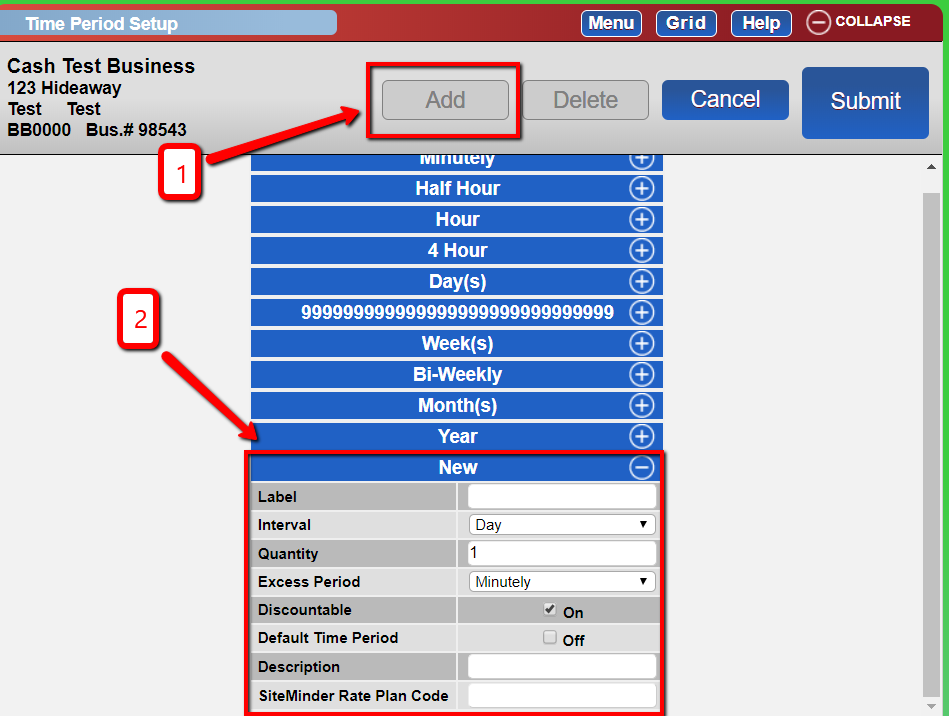
- Fill in the following fields:
- Label: Enter the name of the time period, e.g., "Week(s)".
- Interval: Select the time interval from the dropdown, e.g., "Week".
- Quantity: Adjust the quantity if required for the interval.
- Excess Period: Define the interval to use when bookings overrun this time period.
- Discountable: Choose whether discounts should apply to this time period.
- Default Time Period: Set as the default time period for rate calculations, if applicable.
- Description: Optionally, enter a brief description to help identify or explain the purpose of this time period.
- Type in your Change Control Comments and press the Submit button to finalize.
- Once created, the Time Period is available to enter in rates for the required Unit Type(s) within the Rate Setup panel.
- Note: If the Down to the Minute Grid Module is enabled, "Minute" and "Hour" become available in the Interval dropdown, allowing you to create different Minute Periods, e.g., "1 Hour".
Troubleshooting
- For detailed guidance, refer to the Help Document.
- Watch the Help Video for a step-by-step setup guide.