Billing Policy Setup Instructions
Last modified on:
Overview
This document provides a step-by-step guide to setting up a billing policy for the first time.
Prerequisites
- Access to the billing system with administrative privileges.
Steps
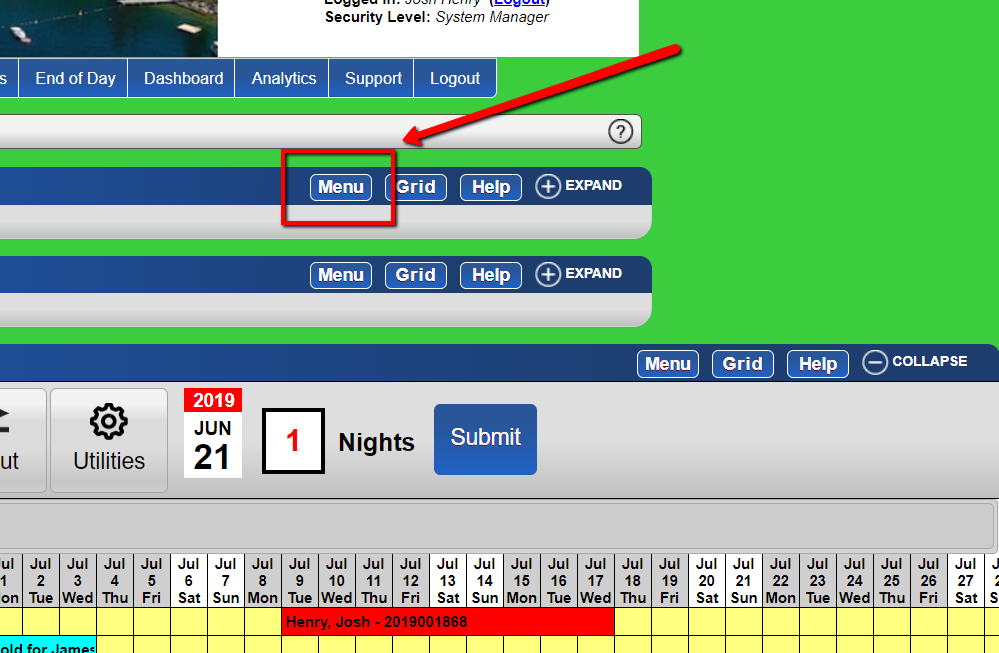
- Access the Menu
- Click on the Menu.
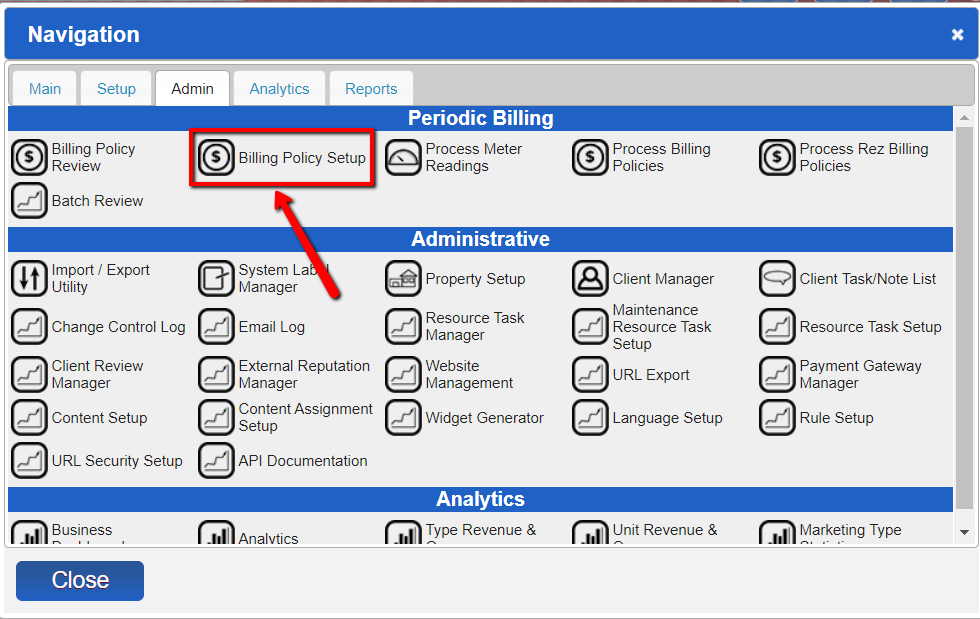
- Navigate to Billing Policy Setup
- Under Admin, go to Billing Policy Setup.
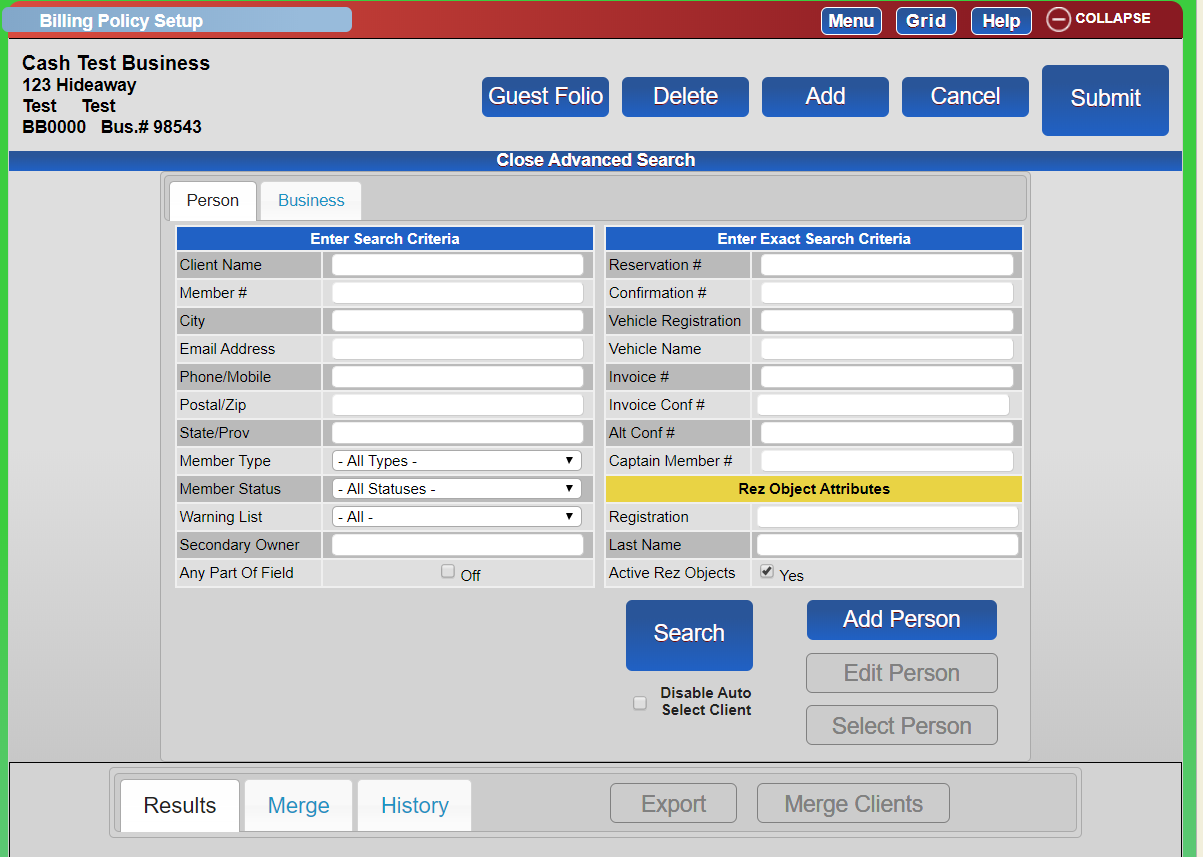
- Search for the Client
- Enter the client's details in the search bar.
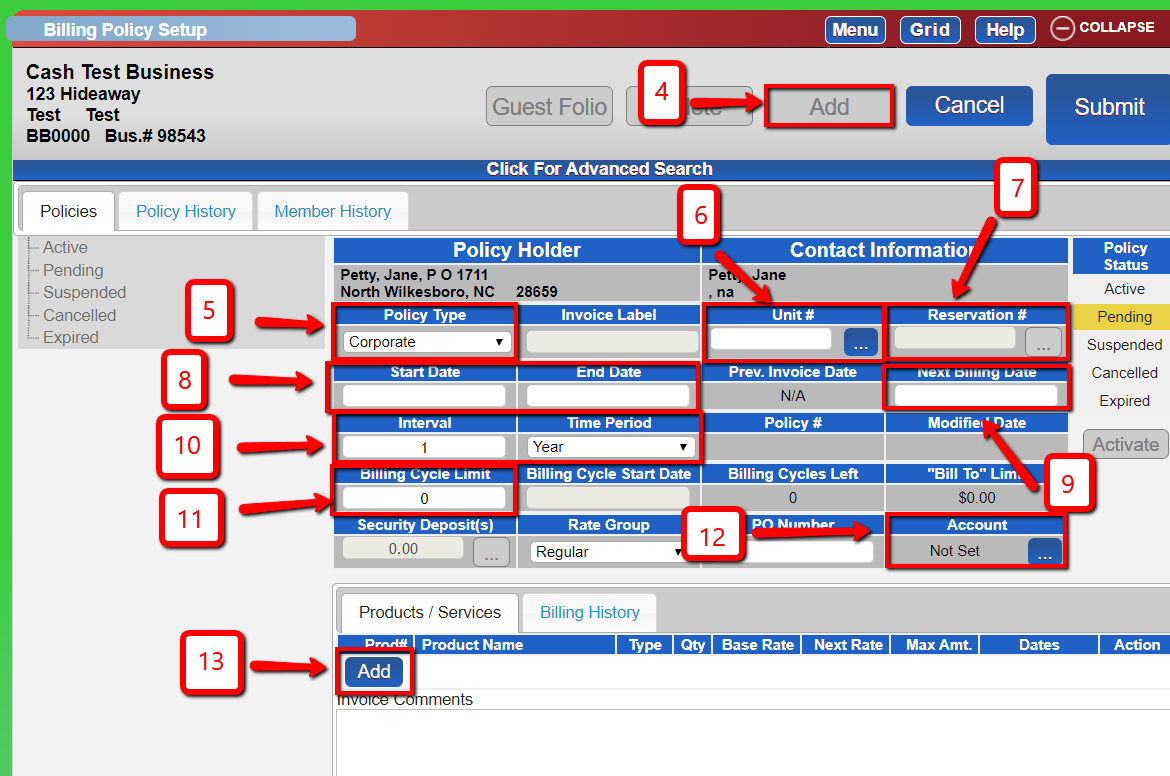
- Add a New Policy
- Click Add.
- Select Policy Type.
- Select the unit the client is staying in.
- Input the reservation number.
- Input start and end date for billing.
- Input the next billing date.
- Input the time intervals for billing.
- Input Billing Cycle Limit if applicable.
- Input the account type if it is an Account Receivable policy.
- Add Products/Services
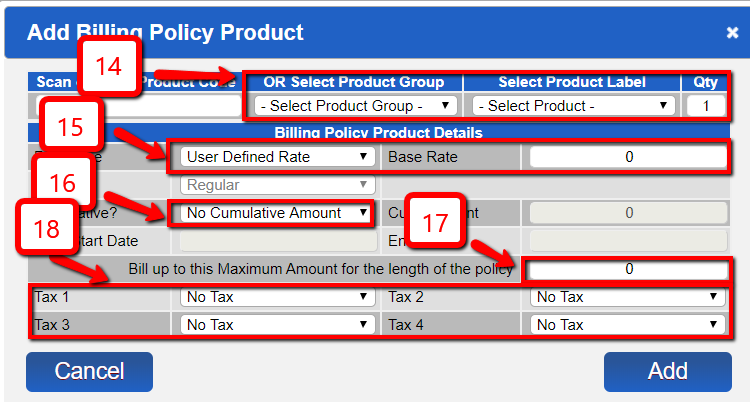
- Under Products/Services, click Add.
- Input Product Group, Product Label, and quantity.
- Select the Rate Type. If it is a User Defined Rate, input Base Rate manually. Otherwise, select Pull from Product Rates.
- Select the appropriate label for the Cumulative Amount.
- Set the Maximum Amount if necessary.
- Add Taxes if necessary and click Add.
- Finalize and Activate the Policy
- Add invoice comments and notes if necessary and click Submit.
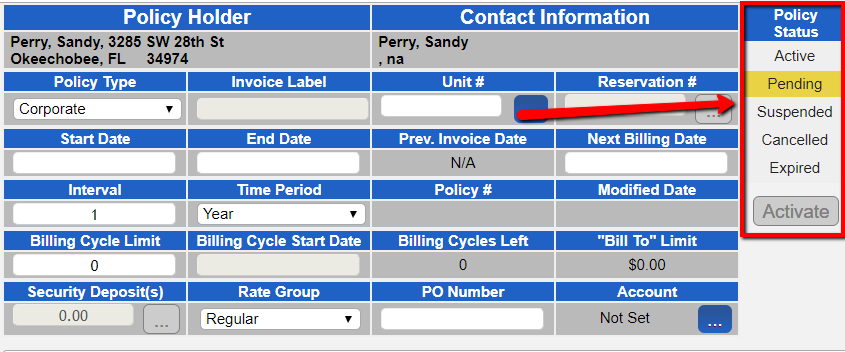
- Click Activate to set the policy to active.
Troubleshooting
- Ensure all fields are correctly filled before submitting.
- Verify client details and reservation numbers for accuracy.
- Check administrative privileges if options are not visible.