Creating a New Discount Type
Last modified on:
Overview
This document provides a step-by-step guide for creating a discount type for the first time.
Prerequisites
- Access to the menu where discount types can be created.
- Necessary permissions to add and configure discount types.
Steps
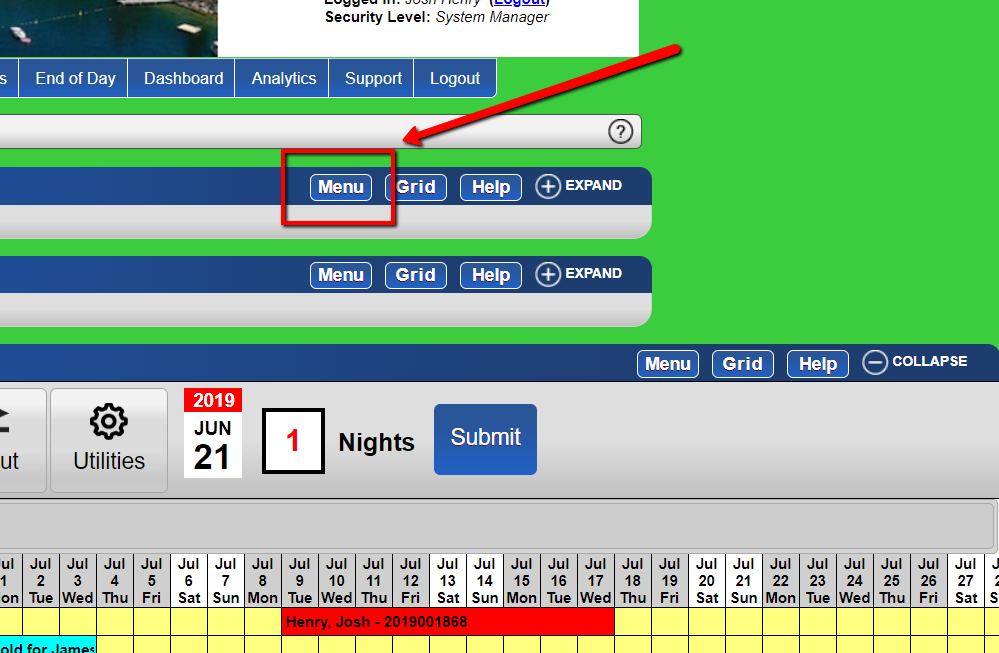
- Navigate to Menu
- Go to the menu where discount settings are available.
-
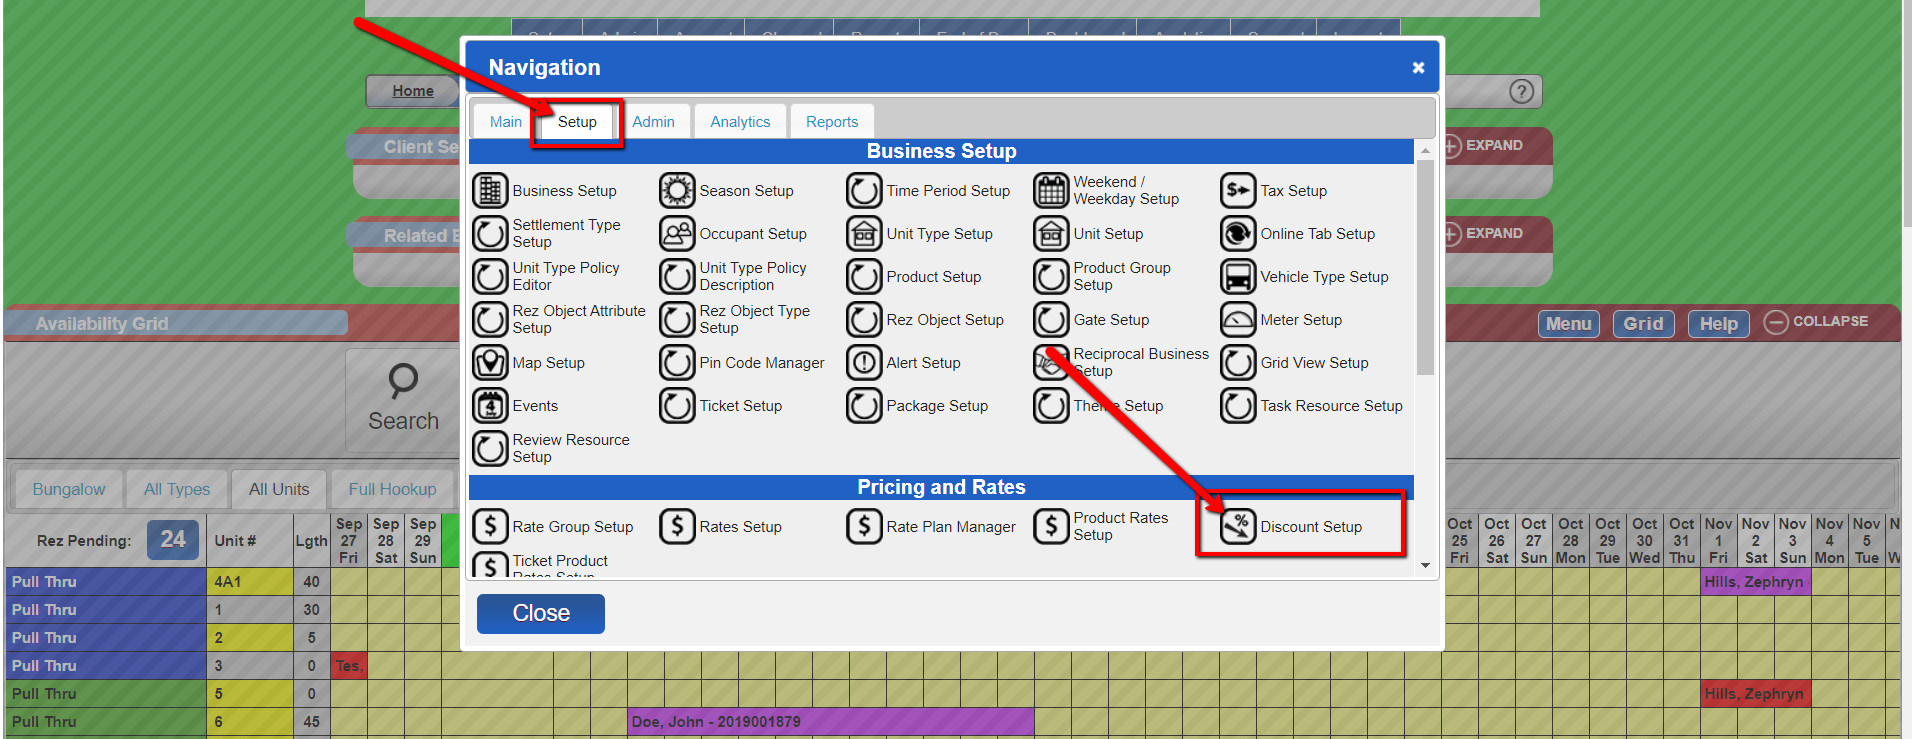
- Select Discount Setup
- Under ‘Pricing and Rates’, select the Discount Setup option.
-
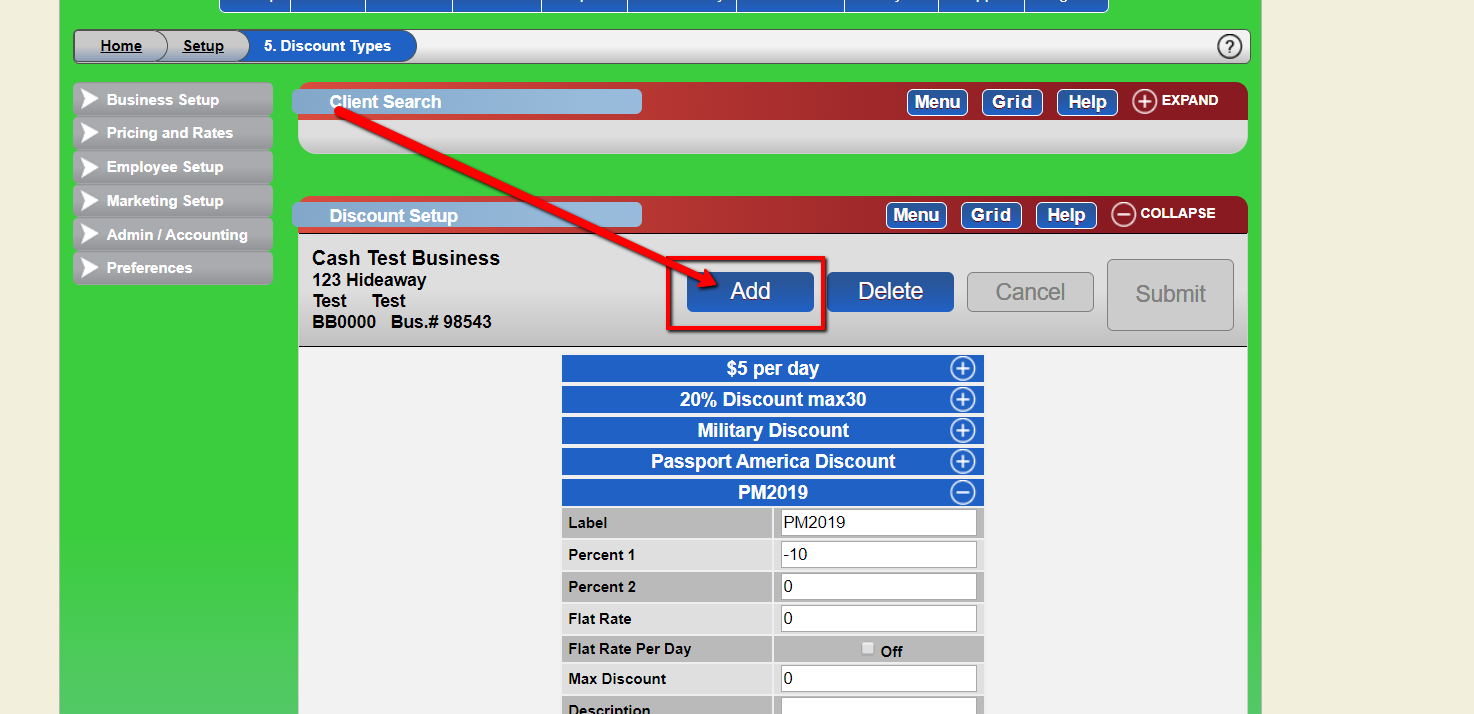
- Add a New Discount
- Click on the "Add" button to create a new discount type.
-
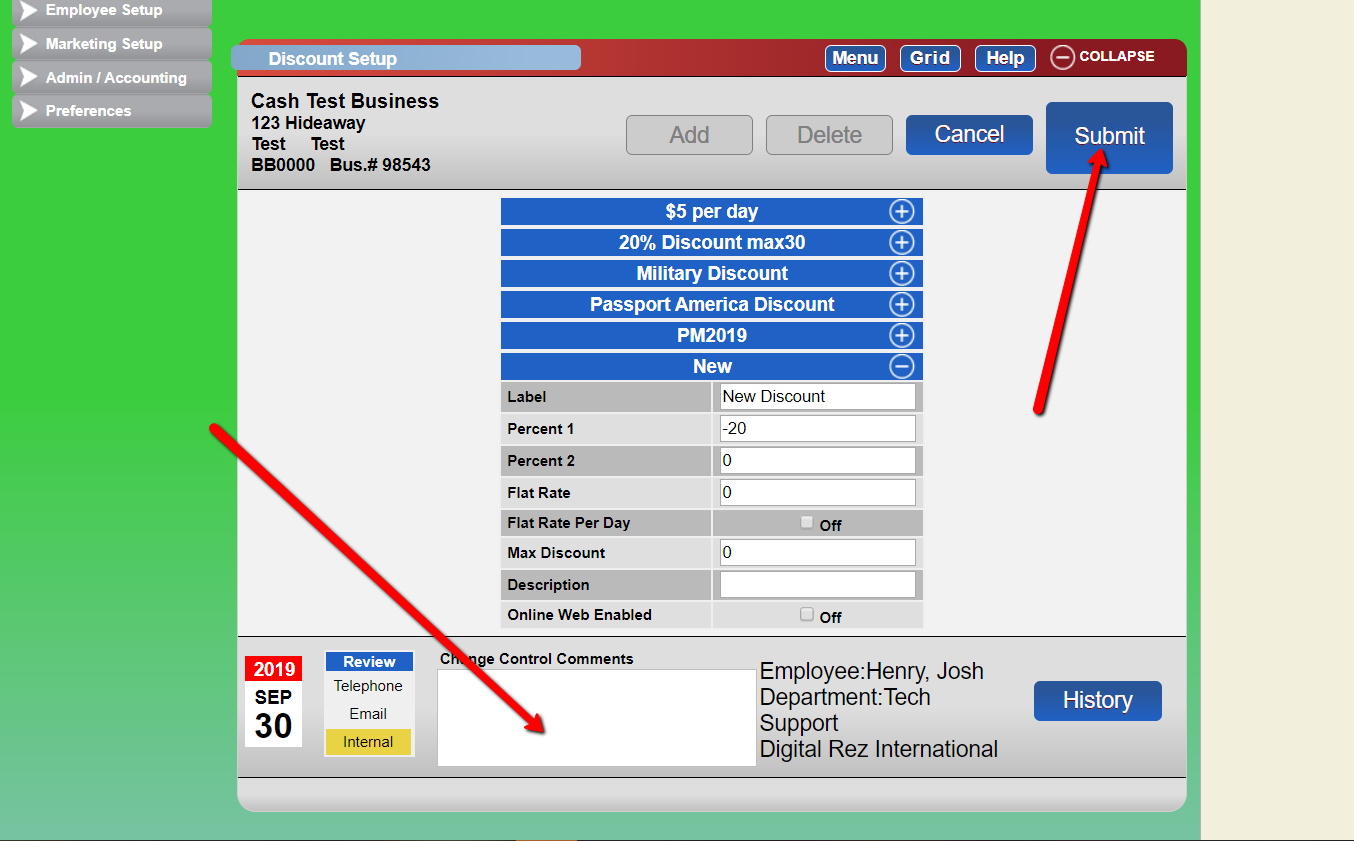
- Configure Discount Details
- Add the appropriate tag for the label.
- Configure the following options:
- Percent 1: The percentage that the discount will be if using the percent format. Use a negative value to indicate a deduction.
- Percent 2: The percentage off of the previous percentage (e.g., if Percent 1 is 10% and Percent 2 is 5%, then Percent 2 is 5% of the 10%).
- Flat Rate: The flat amount that would be deducted as a one-time charge. Use a negative value.
- Flat Rate Per Day: The flat rate charged each day of the reservation or use of a product.
- Max Discount: The maximum amount a discount can be charged.
- Description: A description of the discount for internal purposes.
- Online Web Enabled: Indicates if the discount is to be enabled on the web.
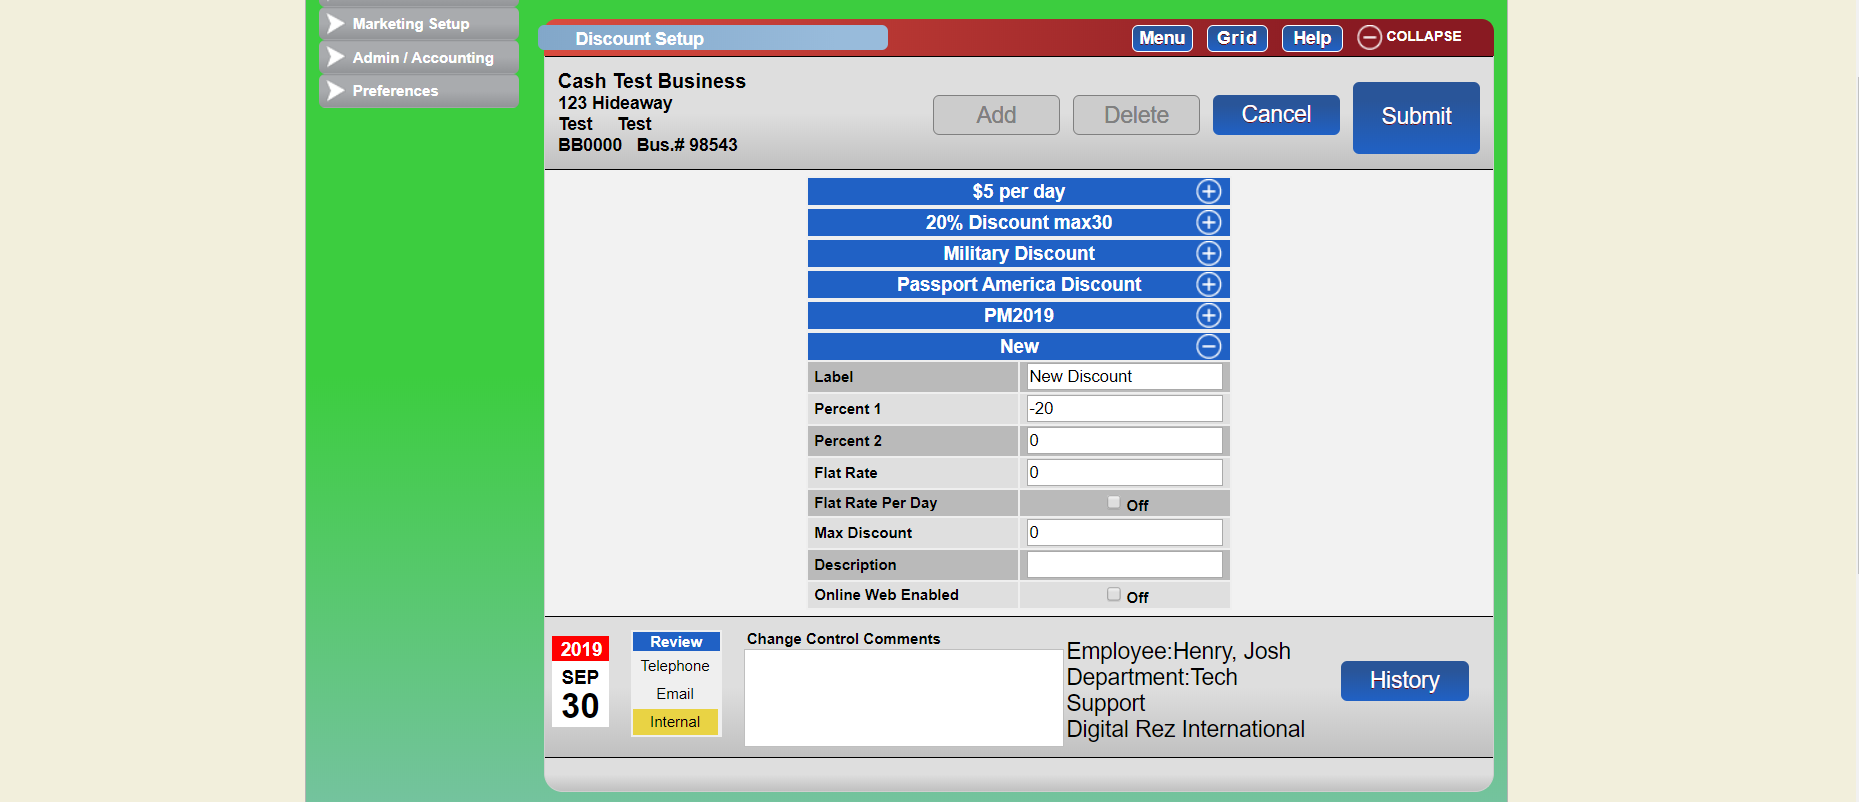
- Submit Changes
- Add a change control comment and submit the new discount type.
-
Troubleshooting
- Ensure you have the necessary permissions to add and configure discount types.
- Verify that all required fields are filled out correctly before submitting.
- Check if the discount is enabled for online use if applicable.