Assigning Discounts and Rates to Clients
Last modified on:
Overview
Setting up memberships allows you to assign unique discounts and/or rate groups to selected clients. Once a membership is assigned to a client, each reservation made for the client will automatically apply the membership discount/rate group.
Prerequisites
- Ensure that membership types are enabled for your business. If not, contact DigitalRez.
Steps
Setting up Discounts or Rates
Option A: Discounts
To create discounts for clients:
- Click on the Menu button.
- Select the Setup tab.
- Click on Discount Setup within Pricing and Rates.
- Click Add.
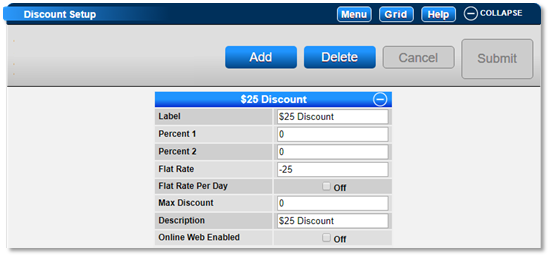
- Label: Enter the name of the discount (e.g., Silver Membership 5%).
- Percentage/Flat Amount: Enter the discount amount (use a negative sign).
Option B: Rates
To enter unique rates, create a rate group:
- Click on the Menu button.
- Select the Setup tab.
- Click on Rate Group Setup within Pricing and Rates.
- Click Add.
- Label: Enter the name of the rate group (e.g., Silver Membership 5%).
- Taxable?: Tick on.
After creating the rate group:
- Click on the Menu button.
- Select the Setup tab.
- Click on Rate Setup.
- Select the Rate Group tab.
- Click Select Date to adjust the start date if required.
- Enter the base rates.
- Click the Occupant Rates button to enter occupant rates.
Setting up Membership Types
To create membership types for clients:
- Click on the Menu button.
- Select the Setup tab.
- Click on Membership Type Setup within Admin/Accounting.
- Click Add.
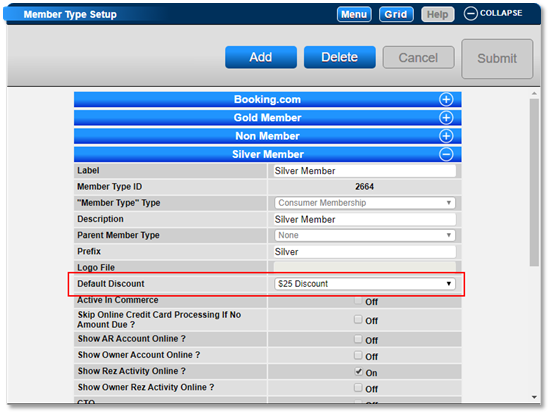
- Label: Enter the name of the membership (e.g., Silver Membership).
- If a discount applies:
- Default Discount: Select the related discount (e.g., Silver Membership 5%).
- If no discount applies, leave Default Discount as None.
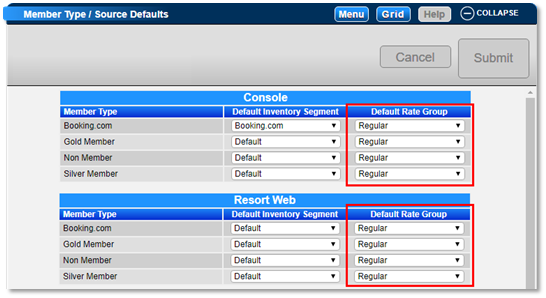
- If a selected rate group applies, expand the Member Type / Source Defaults panel and adjust the Default Rate Group for the membership.
Assigning the Membership to a Client
After setting up memberships, assign them to clients:
- Click on the Menu button and select Availability Grid.
- Click Search to find the client.
- On the right, under Membership Type, select the appropriate membership type for the client (initially set to Non Members).
- Click Submit to finalize.
- Repeat for other clients.
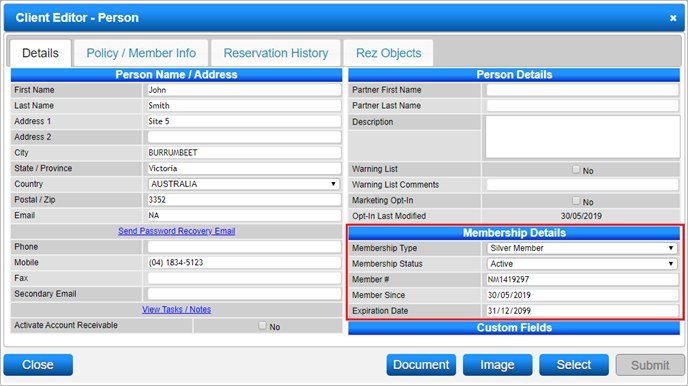
When a reservation is made for the client, the assigned membership (and discount/rate group) will automatically apply.
Troubleshooting
- If a client with an assigned membership reports not receiving their discount/rate group when making a reservation online, it may be due to using a different email address than the one in your client database.
For more information, click here to print the Help Document.