Setting Up Site Lock Fee
Last modified on:
Overview
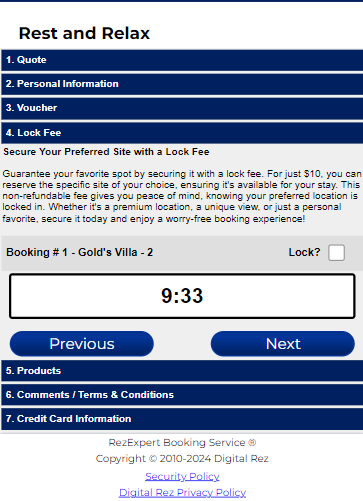
Lock fees can be set up to allow guests to pay an additional fee to secure a selected unit. This fee guarantees the customer the selected unit by providing the option to add this fee to their reservation to secure the specific unit. The Lock fee is displayed in the Booking Details section of the online portal.
Example:
Prerequisites
- Access to the online portal with appropriate permissions to set up lock fees.
Steps
Location
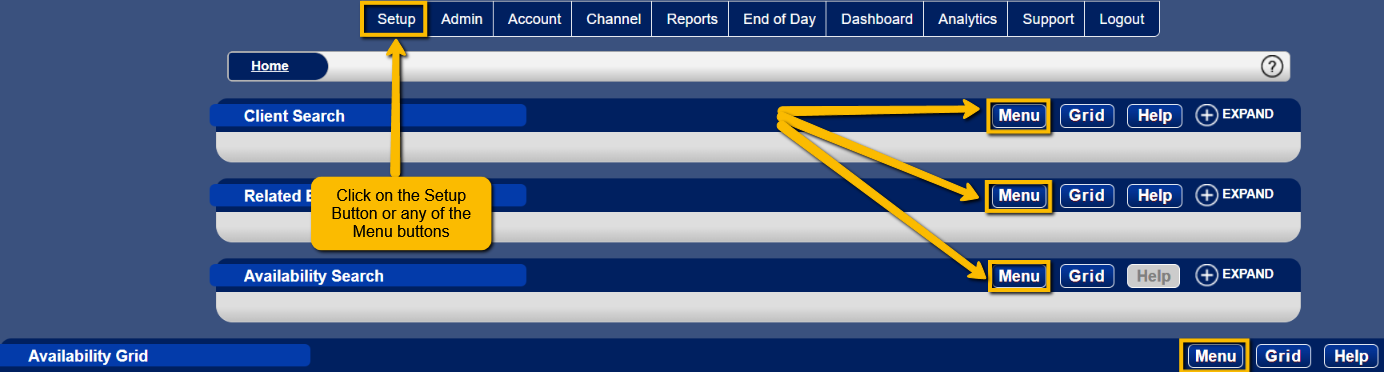
- Click on the ‘Setup’ button or any ‘Menu’ button.
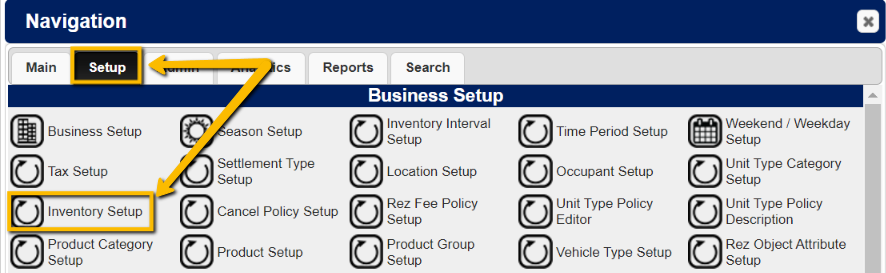
- Navigate to the Setup Tab.
- Proceed to Inventory Setup.
Enabling Lock Fee for a Unit Type
- In the Unit Type tab, select the specific unit type you want to apply the lock fee to.
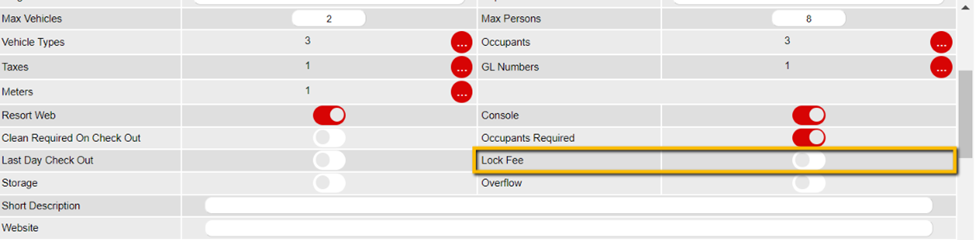
- Enable Lock Fee:
- Toggle the Lock Fee option.
- Click the ‘Submit’ button to save the changes.

Setting up Lock Fee Description (Content Setup)
- Navigate to Content Setup:
- Click on the ‘Menu’ or ‘New’ tab.
- Go to the ‘Admin’ tab and select ‘Content Setup’.
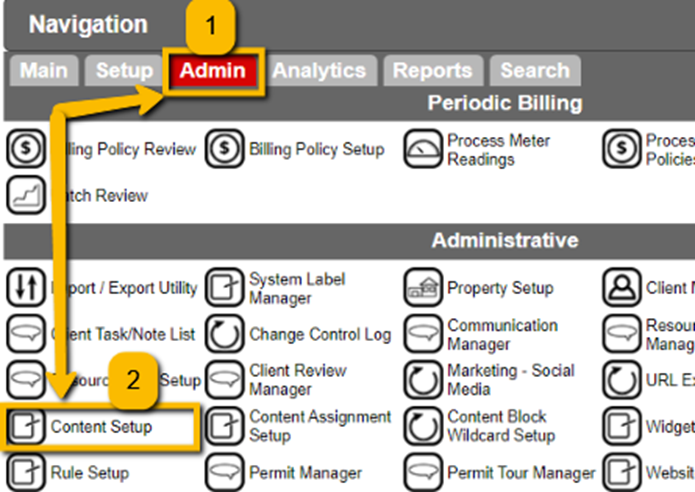
Create New Content
- Click on the ‘Add’ button.
- Enter a name for the content, choose Static HTML from the Content Type dropdown, and Blank from the Copy From dropdown.
- Click the ‘Submit’ button.
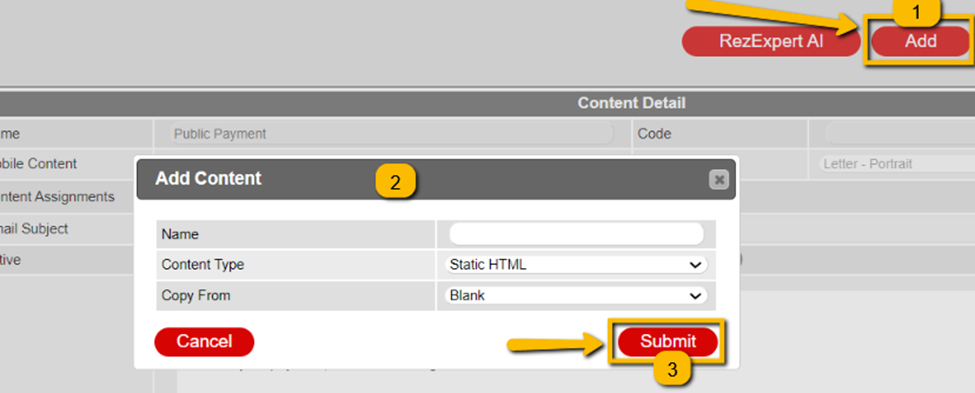
Editing the Content (Lock Fee Description)
- Click on the edit button next to the newly created content.
- Enter the description for the lock fee.
- Click the ‘Select’ button to save the description.
Assign Content
- Click on the three-dot button for Content Assignments.
- Expand the Resort Web – Other heading.
- Toggle on ‘Lock Fee Header’.
- Click on the ‘Select’ button to confirm the assignment.
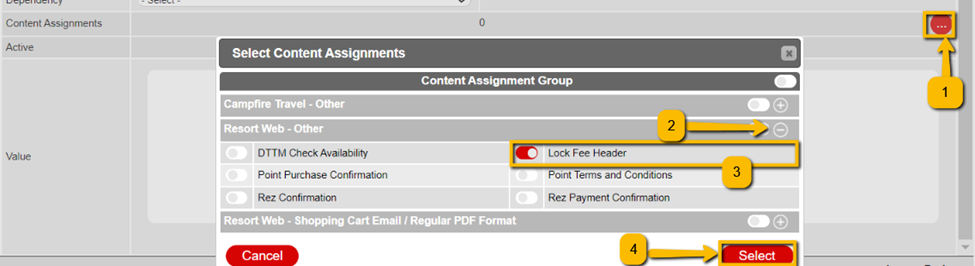
Activate the Content
- Toggle on the Active selector to make the lock fee content active.


Troubleshooting
- Ensure you have the correct permissions to access and modify the setup.
- Verify that all changes are saved by checking the status of the lock fee in the Booking Details section.