Inventory Allocation Management Instructions
Last modified on:
Overview
The Inventory Allocation panel allows users to manage how inventory is allocated between created segments. This interface also enables users to create overrides to adjust the available inventory for each unit type, either increasing or decreasing the amount.
Prerequisites
- Access to the Inventory Allocation panel through the Menu button.
- Familiarity with unit types and segments within the inventory system.
Steps
Location
- Click on the Menu button.
- Under the Main tab, select Inventory Allocation.
Allocate Inventory
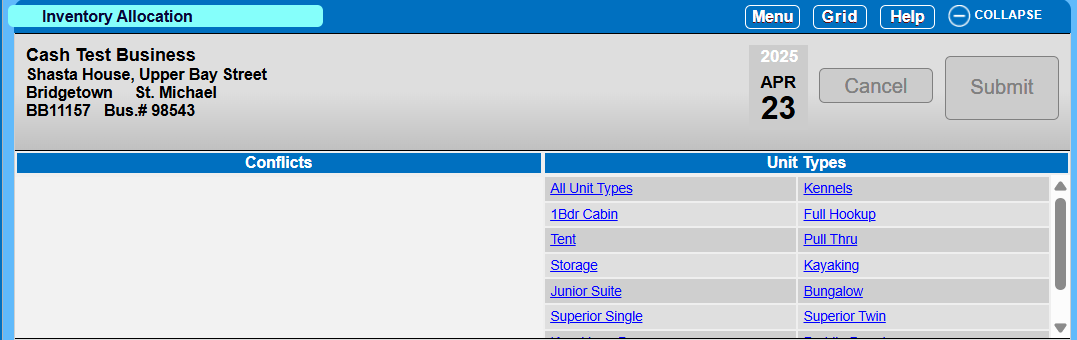
- The panel will list all Unit Types, allowing users to select which Unit Type they wish to modify. Users can either select a specific Unit Type or click All Unit Types to list all Unit Types.
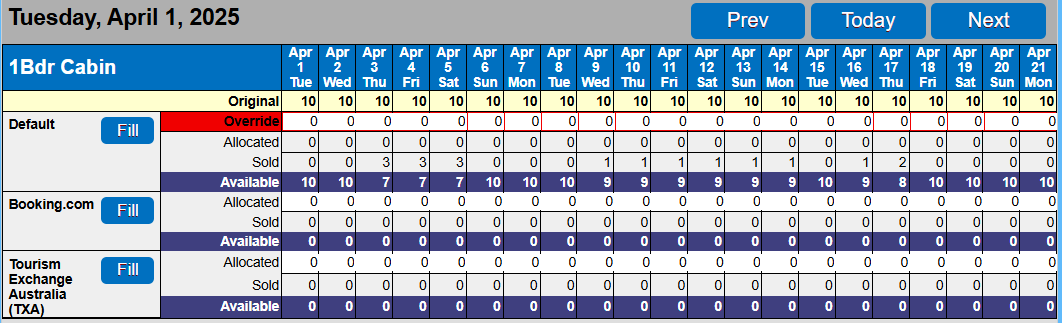
- Once a Unit Type is selected, a calendar display shows how inventory is allocated among segments. Users can manually modify the Override values for the Default segment and the Allocated values for individual segments by clicking the appropriate box and entering the value. This can also be modified in bulk using the Fill button.
- Definitions:
- Original: Total amount of created units.
- Override: Inventory adjustment. A positive value reduces available inventory, while a negative value increases it.
- Allocated: Amount of inventory allocated to a segment. The Default segment shows the total allocated between other segments.
- Sold: Total inventory sold within each segment. The Default segment shows the total sold across all segments.
- Available: Amount of available inventory remaining. The Default segment shows the total across all segments.
Fill Button
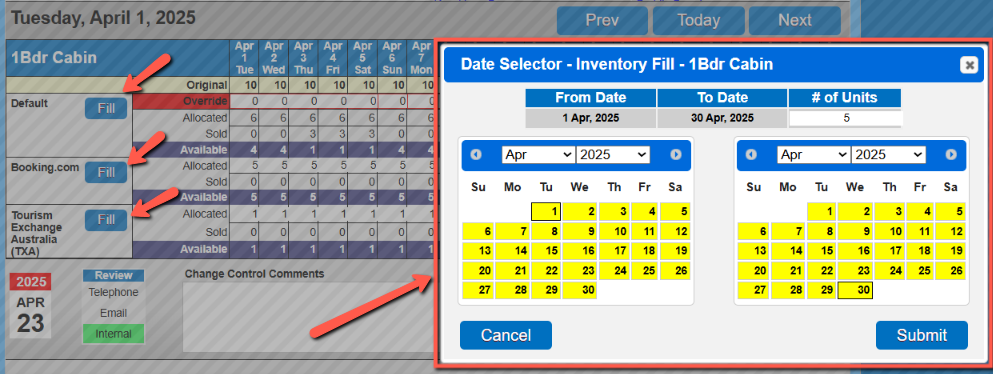
- On the Default Segment, the Fill button displays a dual calendar to select the date range and enter the override value for inventory. A positive value reduces available inventory, while a negative value increases it.
- If the Fill button is selected for a specific Segment, it allocates the entered inventory amount to the selected segment.
Inventory Allocation from the Grid
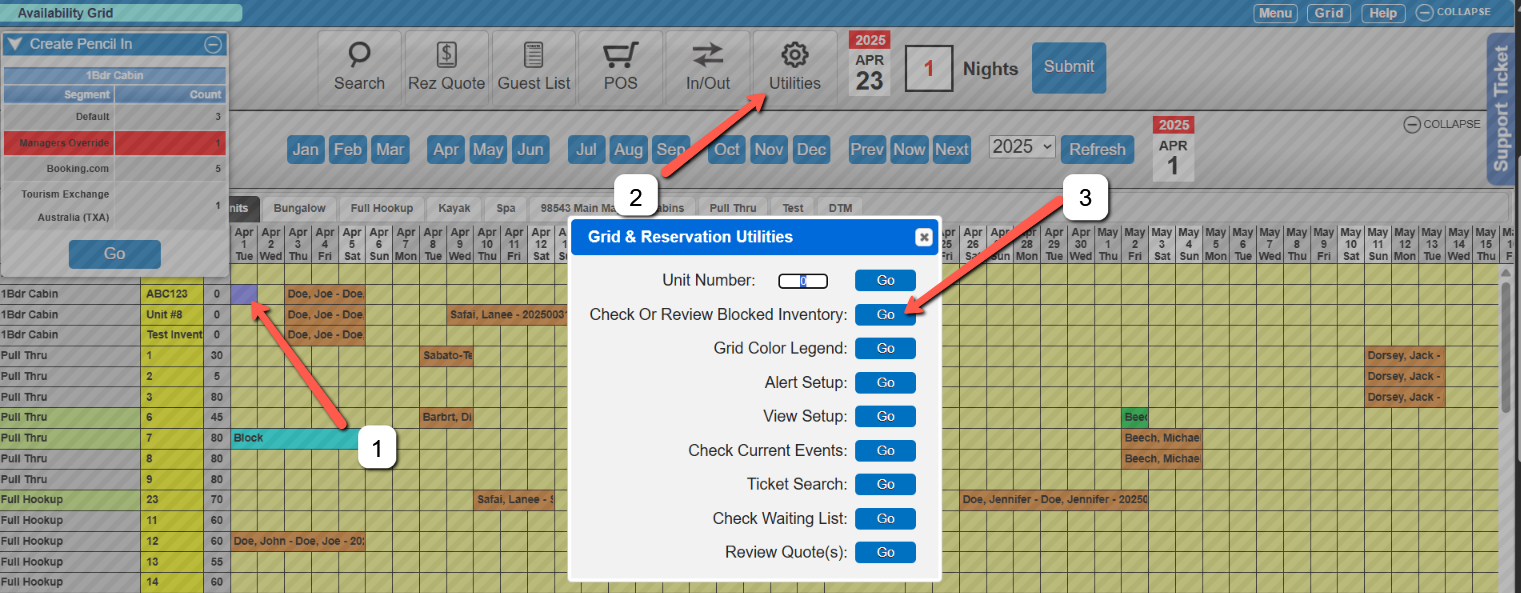
- Inventory can also be modified from the Grid using the Inventory Manager when:
1. There is insufficient inventory available when making a reservation, and a user wants to make a change or manually modify from the Grid.
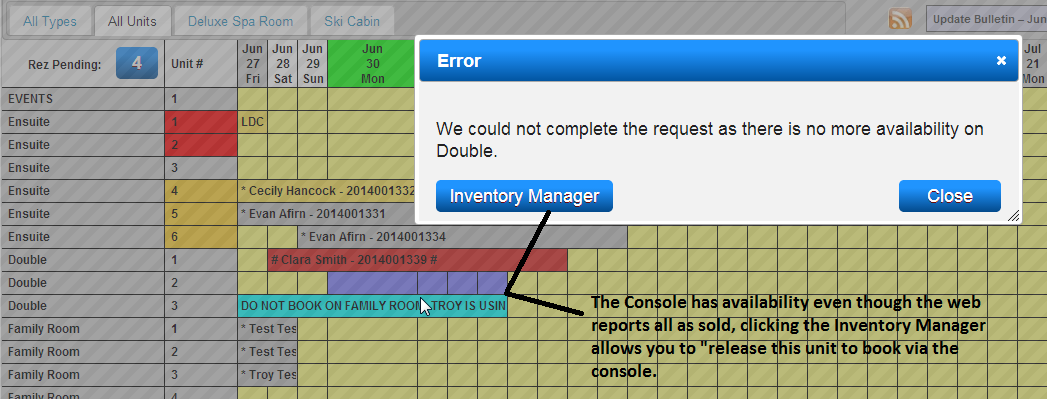
- From the Utilities section on the Availability Grid:
- The user clicks on an available date on the grid for the desired Unit Type.
- Select Utilities.
- Select Check or Review Blocked Inventory.
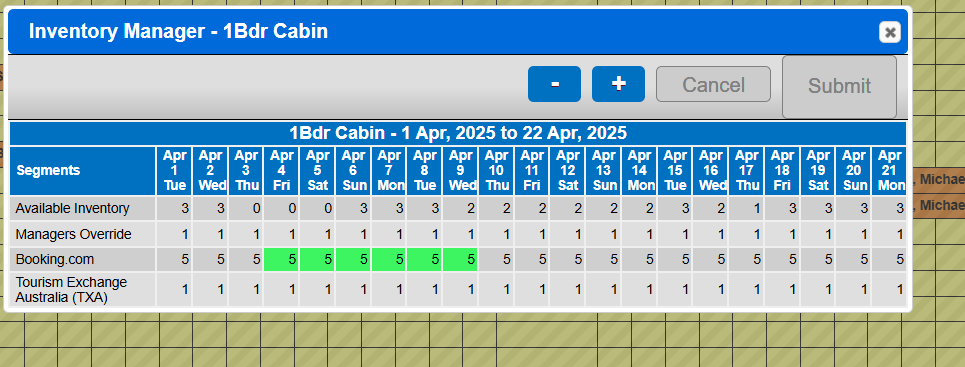
- NOTE: The quantity allocated from the Default Segment (or another segment) will reduce the total units available for sale. Unsold Inventory in segments can be moved back to the Default Segment as required. Adjust inventory individually or highlight the time frame and click – or + to release or increase the number allocated to the required Inventory Segment.
Troubleshooting
- Ensure all necessary permissions are granted to access the Inventory Allocation panel.
- Verify that the correct Unit Type and segment are selected before making adjustments.
- If inventory adjustments do not reflect, check for any system updates or errors in the Inventory Manager.