Adding Products to Inventory System
Last modified on:
Overview
This document provides a step-by-step guide for adding a product for the first time.
Prerequisites
- Access to the product setup menu.
Steps
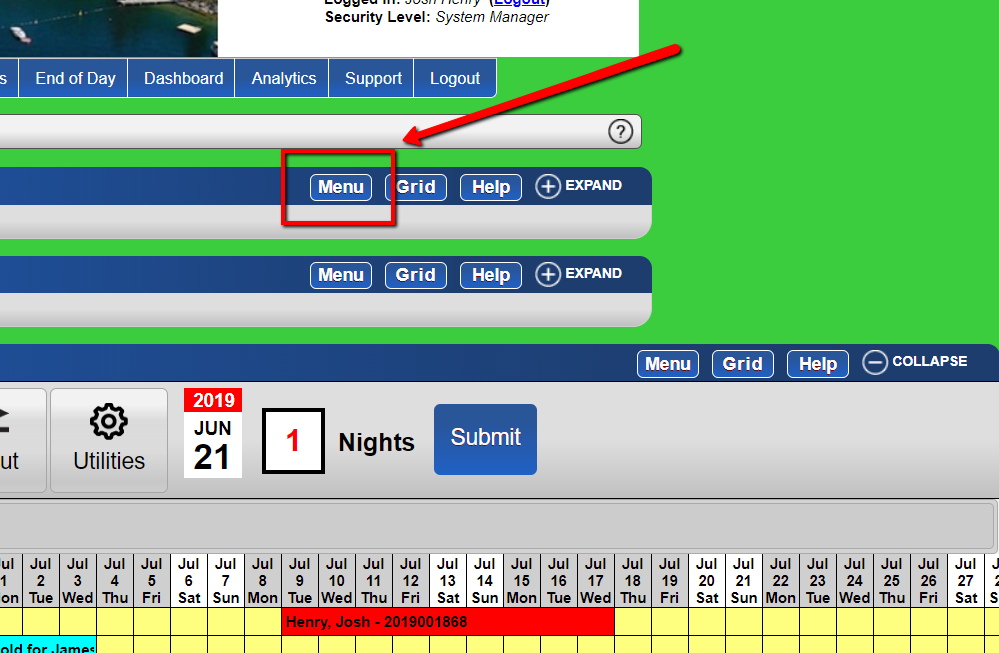
- Click Menu
- Navigate to the main menu.
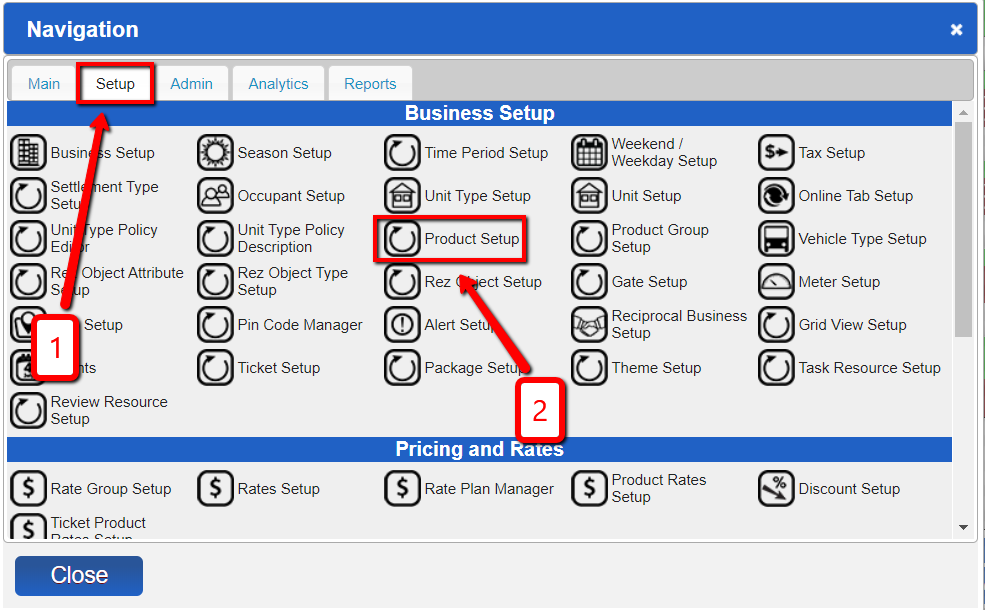
- Under Set up, go to Product Setup
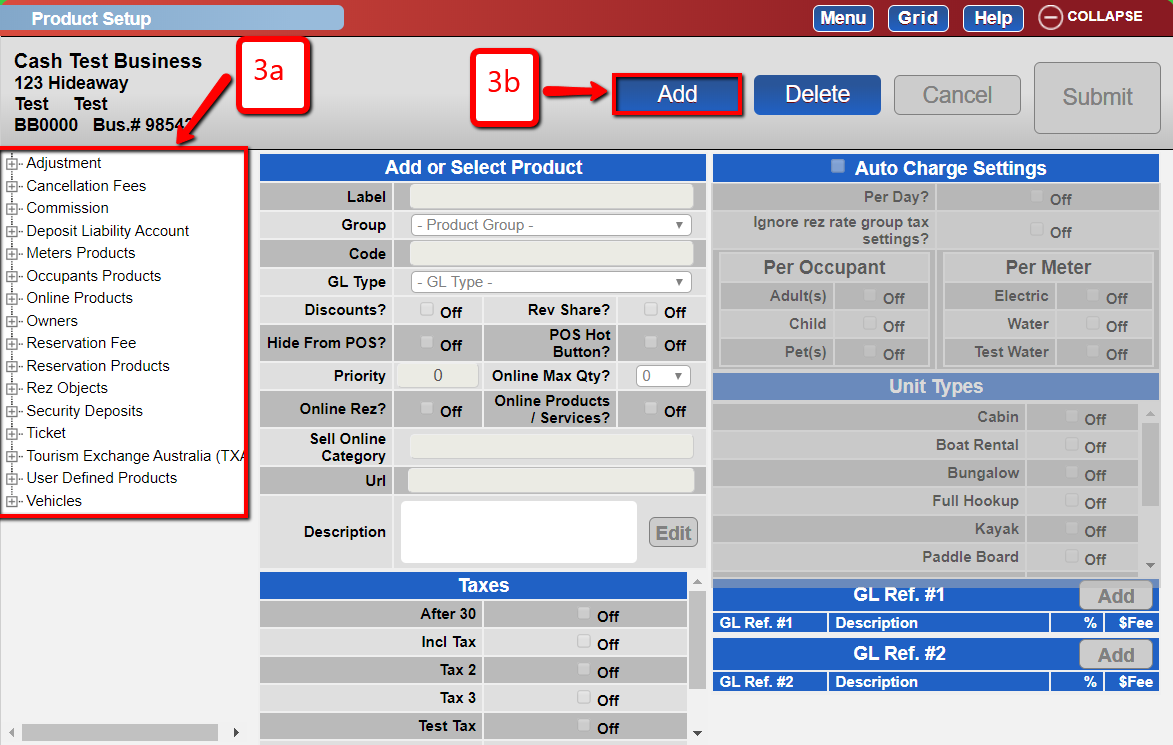
- Select the product group
- Choose the product group the item will belong to and click "Add".
- Configure details for the product
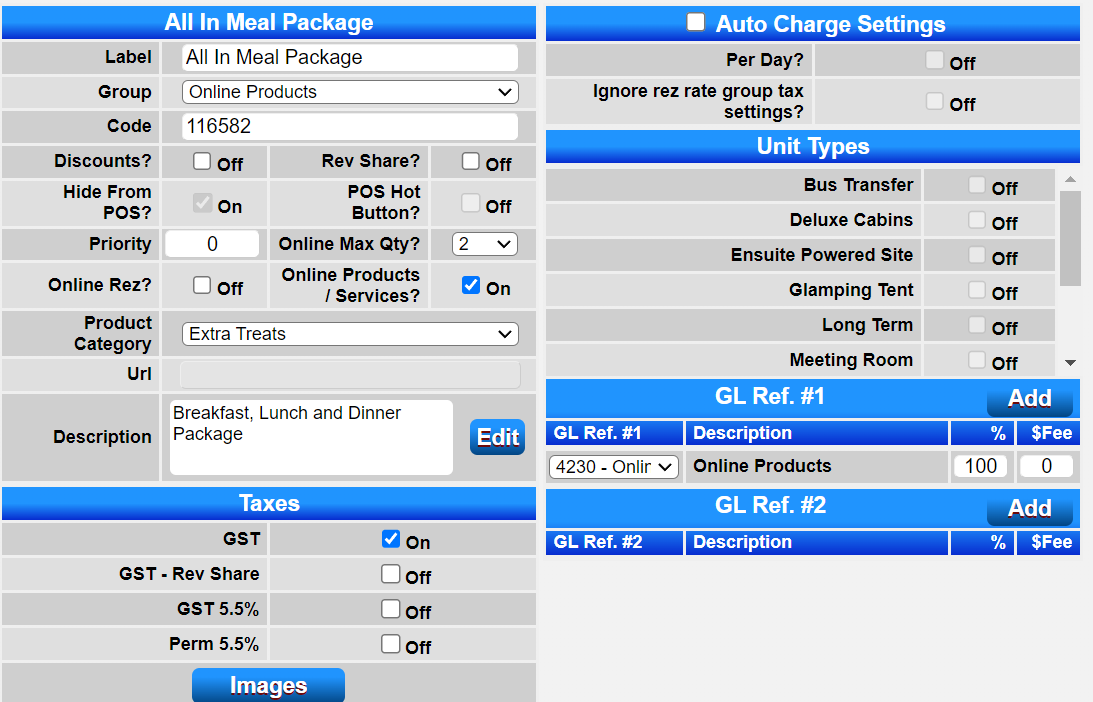
- Label: Name of product (required)
- Product Group: Set how the product will be categorized (a new group can be created from the Product Group Setup) (required)
- Code: Assign a code to easily retrieve the product (Optional)
- Discount: Select if this product can be discounted
- Rev Share: If this product is owned by a third party and the business is getting some of the profits.
- Priority: Set the sort value number to manage the order of products (Optional)
- Hide From POS: Product is hidden in the POS screen
- POS Hot Button: Add to favorite’s list. Show to the top of the POS screen
- Online Max Quantity: Set the maximum quantity at a given time for this product to be sold online
- Online Rez: Make the product available in the reservation booking process on the online portal
- Online Products/Services: Make this product available in the POS store online
- Product Category: Categorize products on the Online Store (Category is created in the Product Category Setup)
- Description: Add description of the product by clicking "Edit"
- Taxes: Apply applicable taxes
- Auto Charge Settings: Enable if the product is supposed to be applied automatically to a reservation. Specify the applicable Unit Types. Note: The rate for this product needs to be configured to function
- GL Number: Assign a GL number to the product
- Enter the Change Control Comment
- Click Submit
Troubleshooting
- Ensure all required fields are filled out correctly.
- Verify that the product group and category are set up prior to adding a product.