Automated Email Setup Instructions
Last modified on:
Overview
This document provides a step-by-step guide to setting up automated emails.
Prerequisites
- Access to the Grid interface
- Permissions to access the Admin tab
Steps
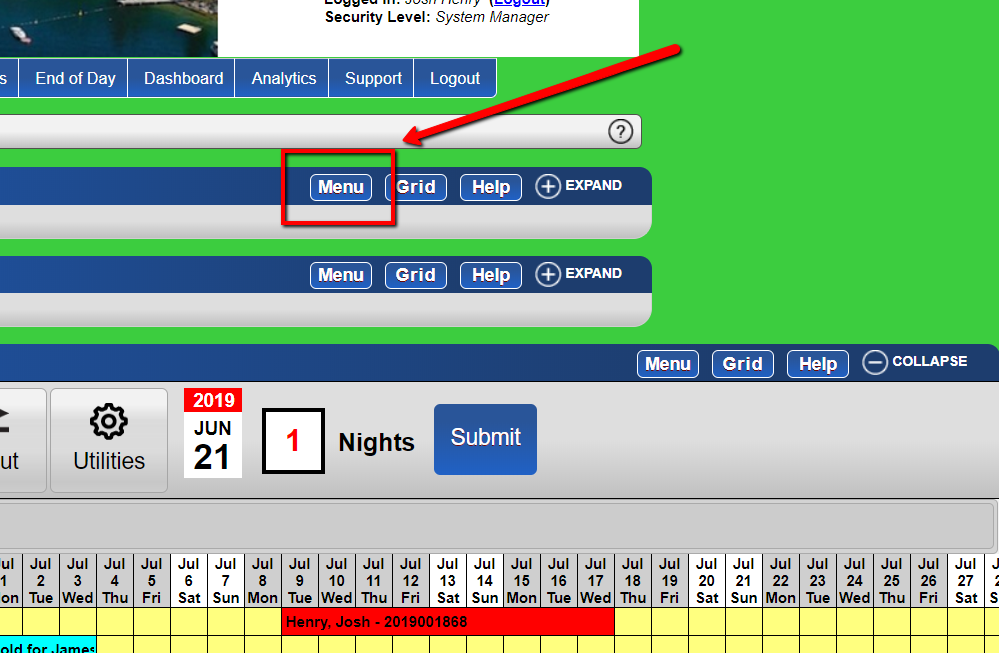
- Access the Menu
- From the Grid, click the Menu button.
-
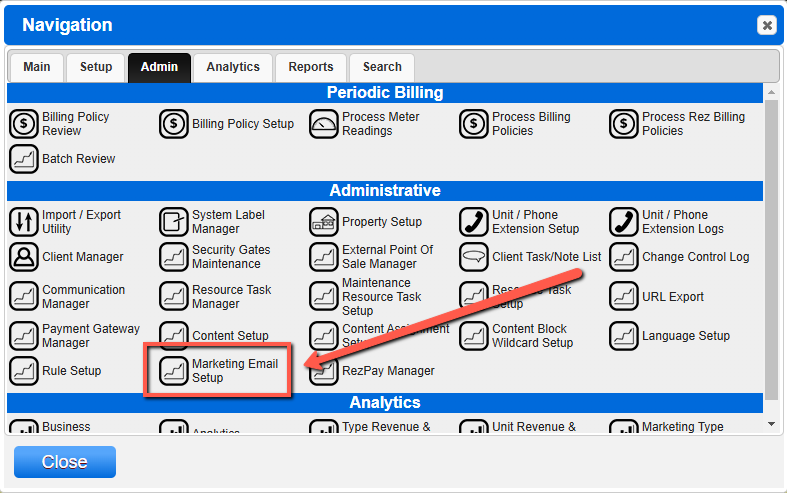
- Navigate to Marketing Email Setup
- Under the Admin tab, select Marketing Email Setup.
-
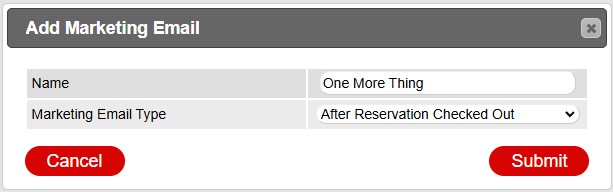
- Add a New Marketing Email
- Click the Add button.
- Input the Name of the Marketing Email.
- Select the Marketing Email Type (e.g., "After Reservation Checked Out", "Before Reservation Check In", "Before Reservation Check Out").
- Click Submit.
-

- Fill in Applicable Fields
- Name
- Email Subject
- Target Type (necessary before selecting Email Body Content)
- Email Body Content (created in Content Setup and Assigned in Content Assignment Setup)
- Active (to make available)
- Number of Days (before or after check in/out)
- Target Date Range Active (time frame applicability of this email)
- Link to Unit Type (if specifically for certain types)
-

- Submit the Email Setup
- Click Submit.
-

Troubleshooting
For more information about creating automated emails, click here.