Permit Tour Manager Panel Instructions
Last modified on:
Overview
The Permit Tour Manager panel displays all CTO purchased Permit Tours.
Prerequisites
- Access to the Admin tab in the application menu.
Steps
Location
- Click on the Menu button.
- Select the Admin tab.
- Choose Permit Tour Manager.
Panel
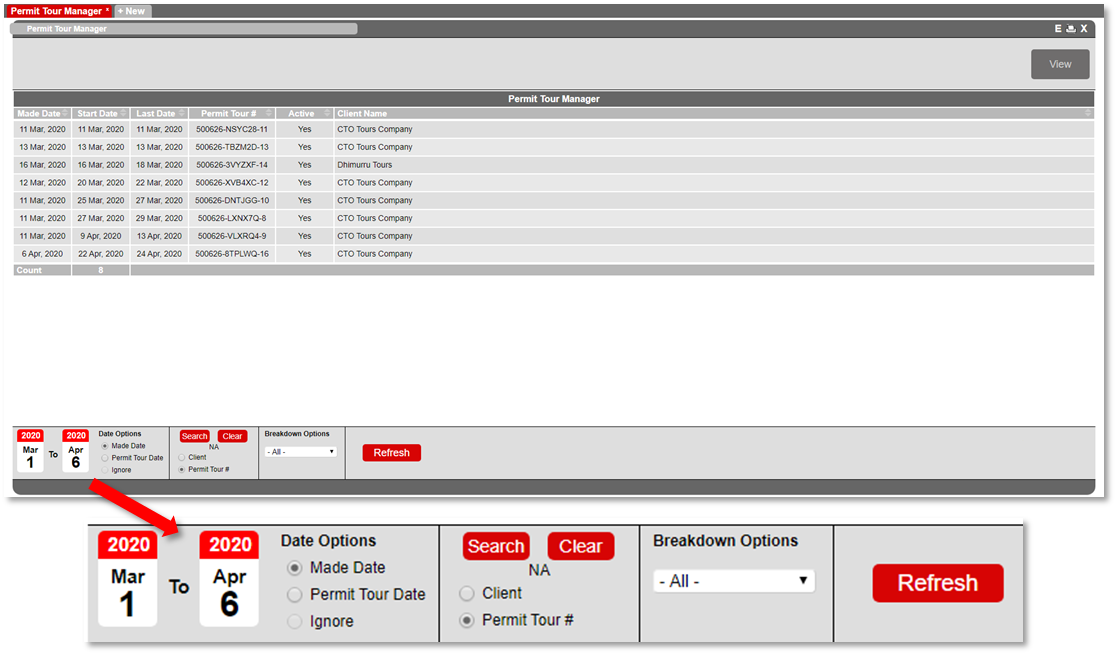
- Made Date: Date the Tour was sold.
- Start Date: Date the Tour is valid from.
- Last Date: Date the Tour is valid until.
- Permit Tour #: Permit Tour number.
- Active: Indicates if a Permit Tour has been cancelled by the CTO/Business.
- Business Name: Name of CTO/Business who purchased/booked the Tour.
Search Options
- Made Date: Date range the Tour was purchased.
- Permit Tour Date: Date range of the Tour.
- Business Name: Search for the CTO/Business who purchased the Permit Tour.
- Permit Tour #: Search for a selected Permit Tour number.
To search:
- Select the required search parameter.
- Click Search to enter the client name or permit number.
- Click Clear to reset the search.
Breakdown Options
- Narrow down the display options to the type of permit.
- Select the required Permit type from the dropdown and click Refresh.
View
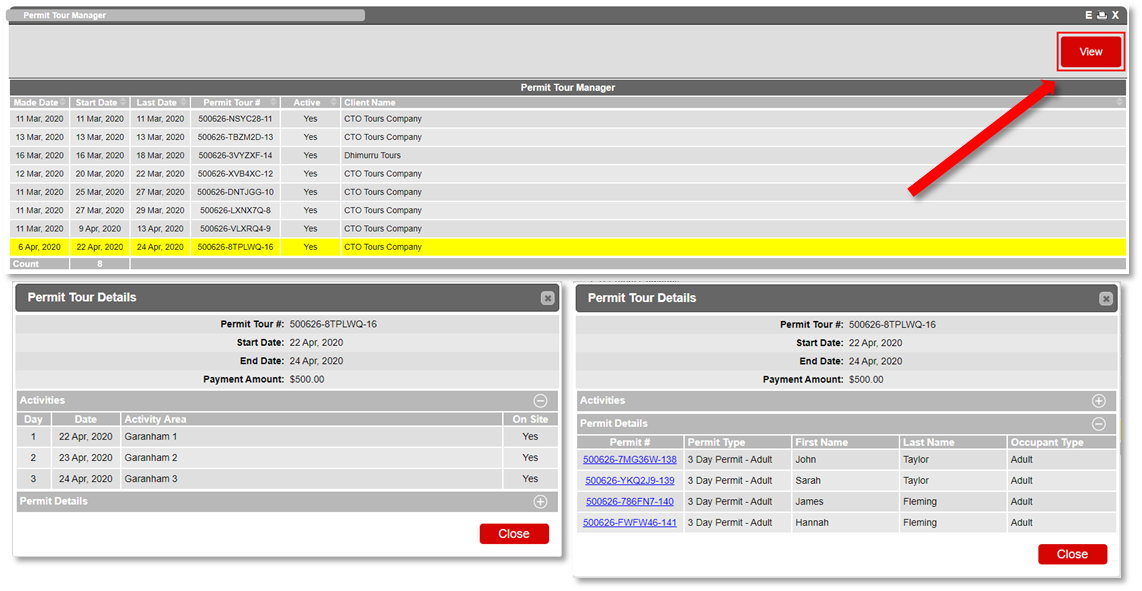
- To view a selected Tour's details, select the Tour and click the View button.
- All details of the Tour will display.
Activities
- Displays the Date and Location Area selected.
- Reflects any edits made by the CTO to the Location or Dates.
Permit Details
- Displays the Permit Types and Client Details entered by the CTO.
- Click the Permit # to view more information about the Client associated with the Permit.
Troubleshooting
- Ensure you have the necessary permissions to access the Admin tab.
- Verify the correct search parameters are selected for accurate results.