Creating Seasons in the System
Last modified on:
Overview
This document provides a step-by-step guide on how to create seasons within the system.
Prerequisites
- Access to the home screen of the application.
Steps
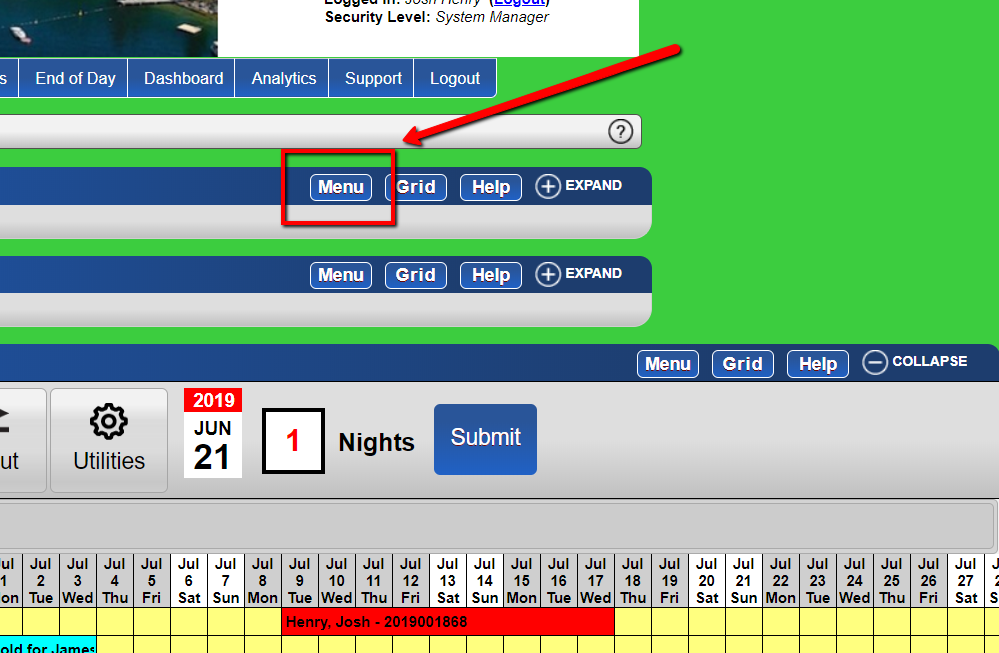
- Access the Menu
- From the home screen, click the "Menu" button.
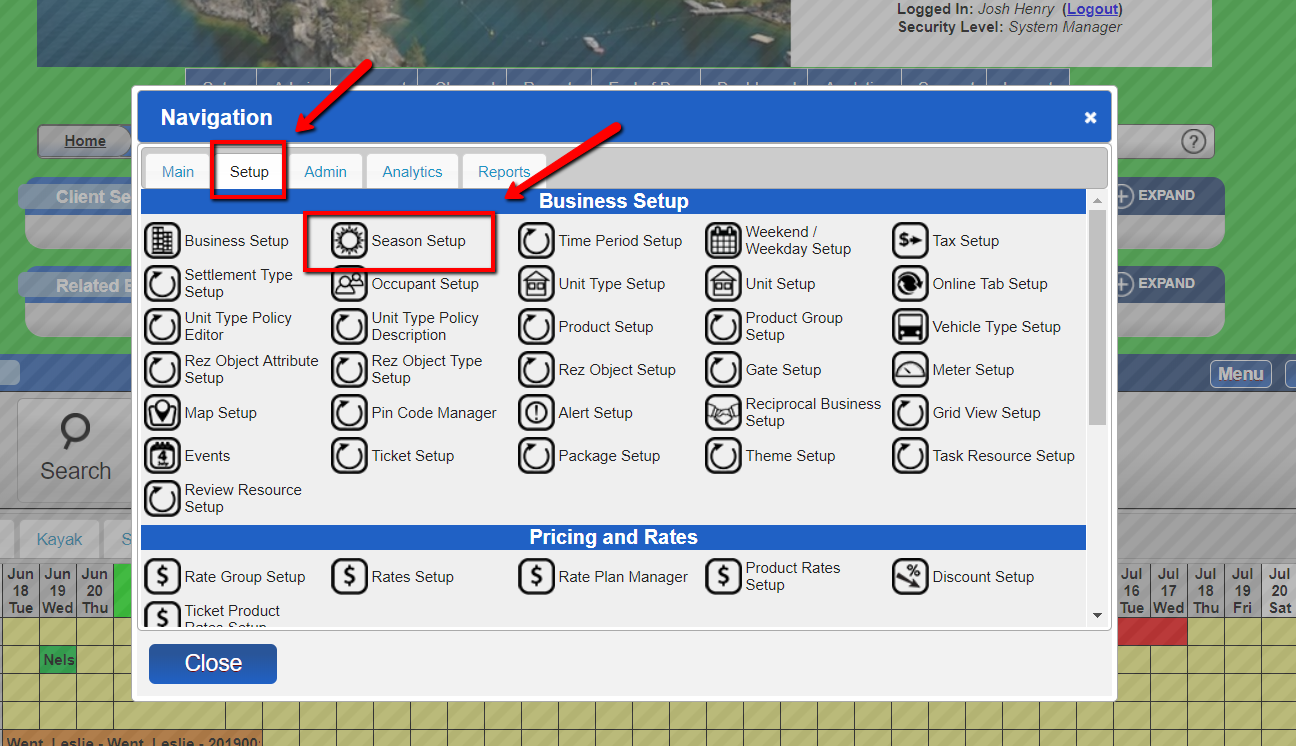
- Navigate to Season Setup
- Choose the "Season Setup" option under the "Setup" tab.
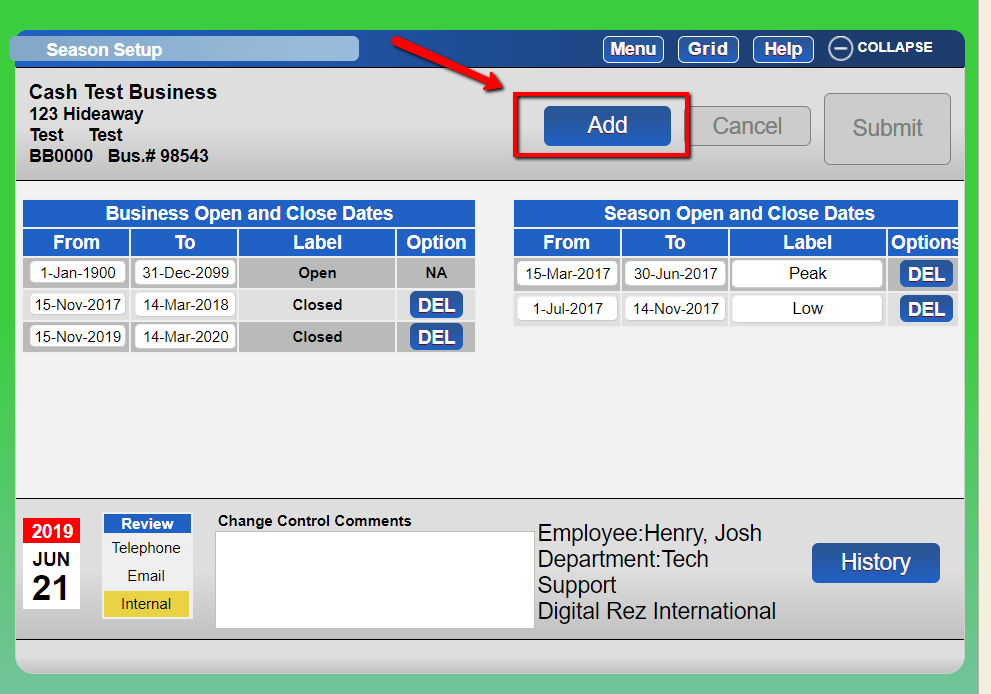
- Add a New Season
- Click on the "Add" button.
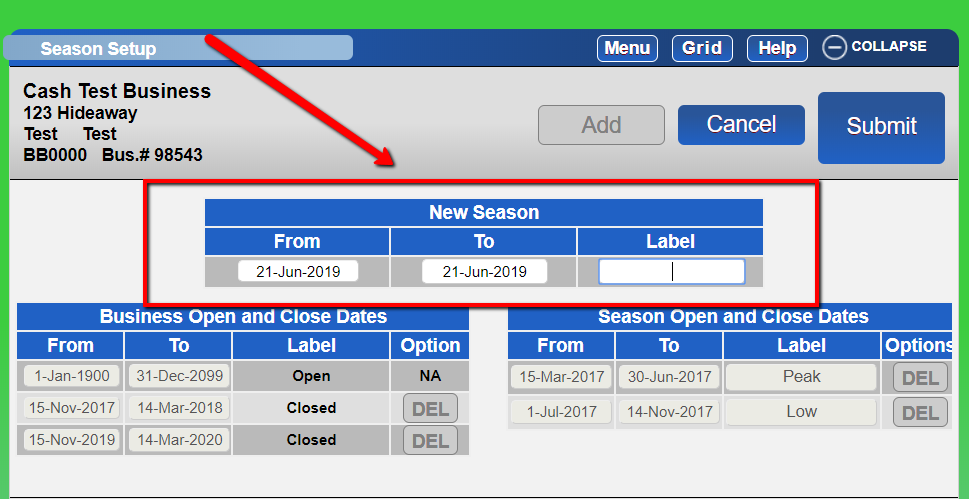
- Configure Season Details
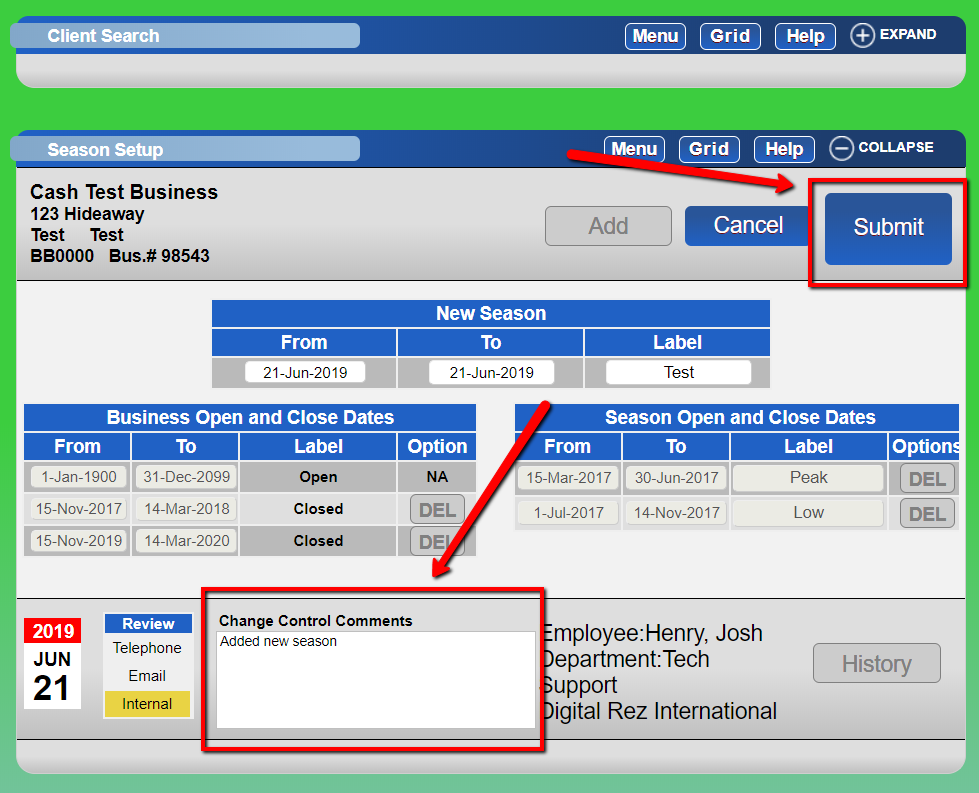
- Choose the "From" and "To" dates for the season you want to create.
- Provide an appropriate label for the season. Use "Closed" as the label if setting a season for business closure.
- Submit Changes
- Enter your change control comments and click the "Submit" button.
Troubleshooting
- Ensure all fields are filled out correctly before submitting.
- Verify that the dates do not overlap with existing seasons unless intended.