Returning to AR Account After POS Entry
Last modified on:
Overview
This document outlines how to double-check transactions and log payments in an Accounts Receivable account by navigating back to it following a sale in the Point of Sale system.
Prerequisites
- Access to the Accounts Receivable section.
- Access to the Point of Sale system.
Steps
Access the New Sale Screen
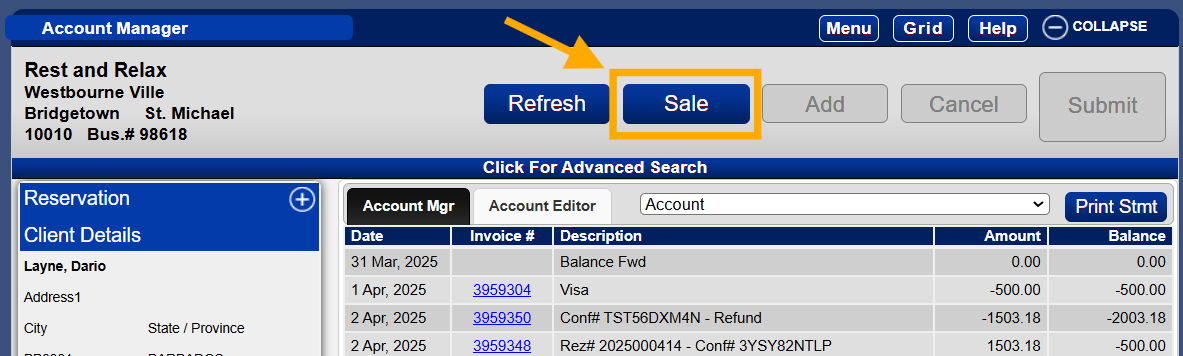
- Start by clicking on "Sale" within the Accounts Receivable section.
Complete the Sale Entry
- You'll be directed to the New Sale Screen. Enter all the necessary details for the sale.
- Once you've finished entering the sale information, click "Submit" to record the transaction.
Return to the AR Account
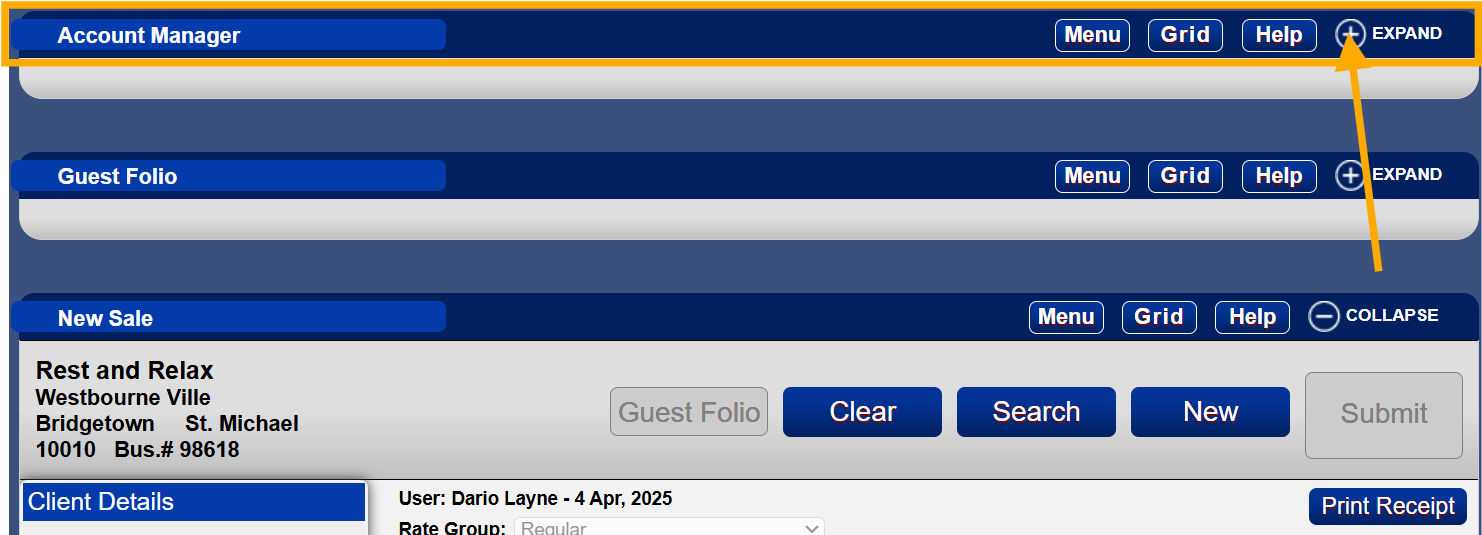
- To return to the AR account you were working with, scroll up on the page.
- Expand the Account Manager: This will return you to the active account you're currently in.
Review Adjustments
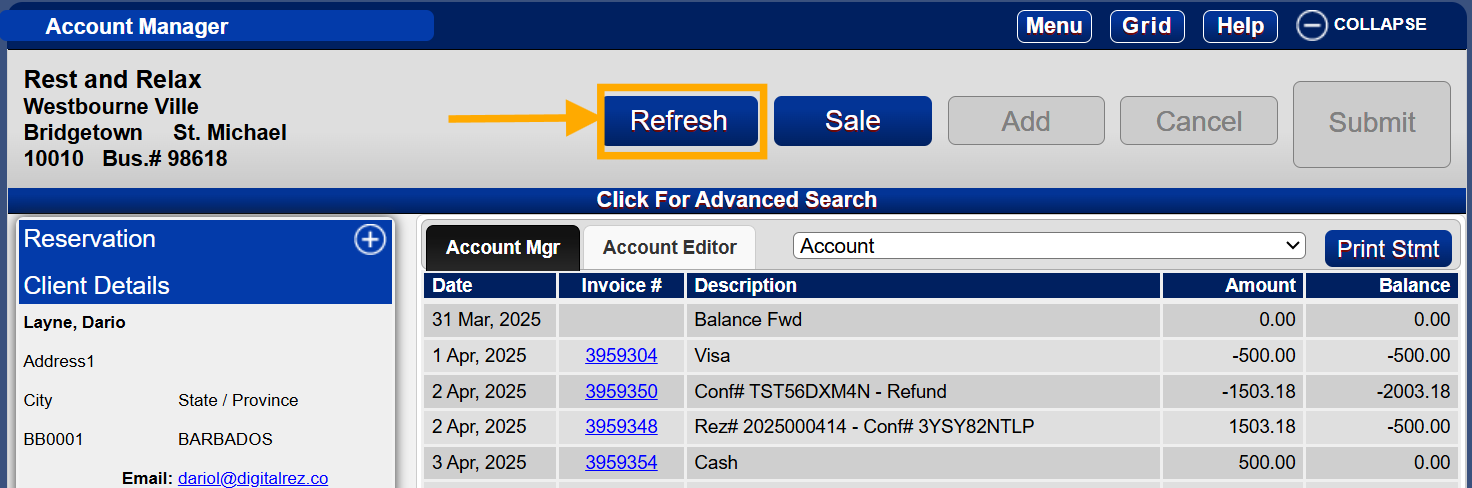
- To view any adjustments made or the details of the sale, click the "Refresh" button.
Troubleshooting
- Ensure that you have the necessary permissions to access the Accounts Receivable and Point of Sale systems.
- Verify that all sale details are entered correctly before submitting to avoid errors.