Adding Views in Application Utilities
Last modified on:
Overview
This document provides a step-by-step guide for adding views for the first time.
Prerequisites
- Ensure you have access to the Utilities section of the application.
Steps
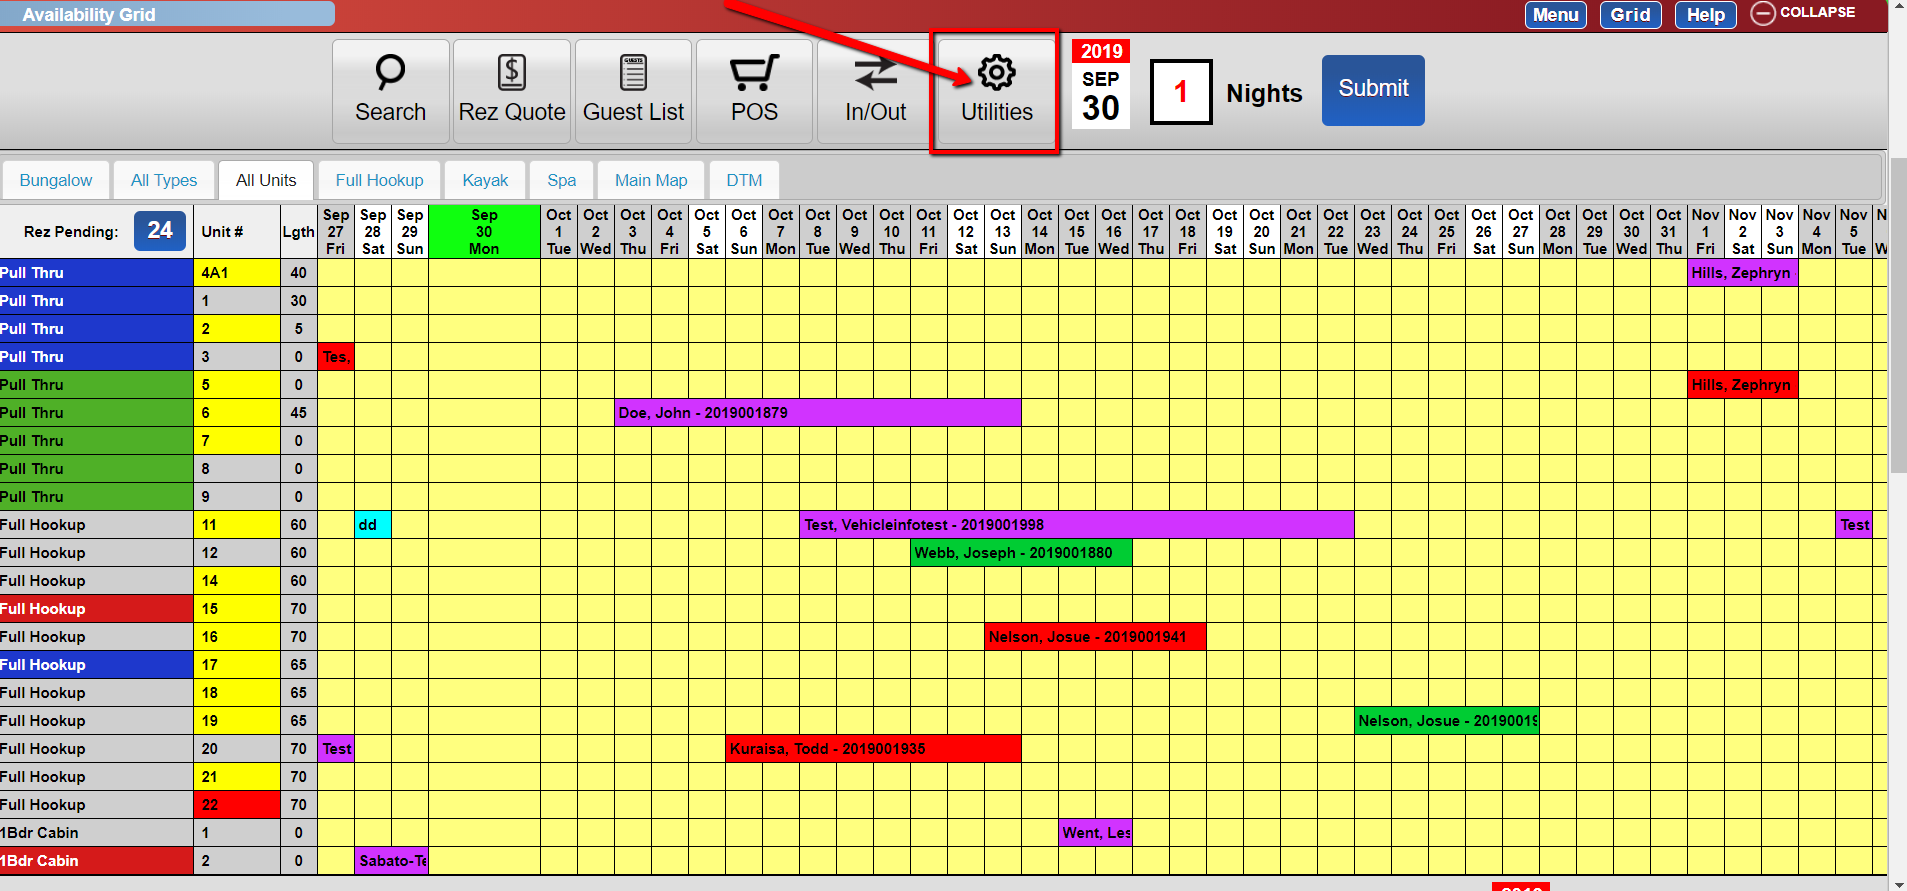
- Go to Utilities
- Navigate to the Utilities section of the application.
-
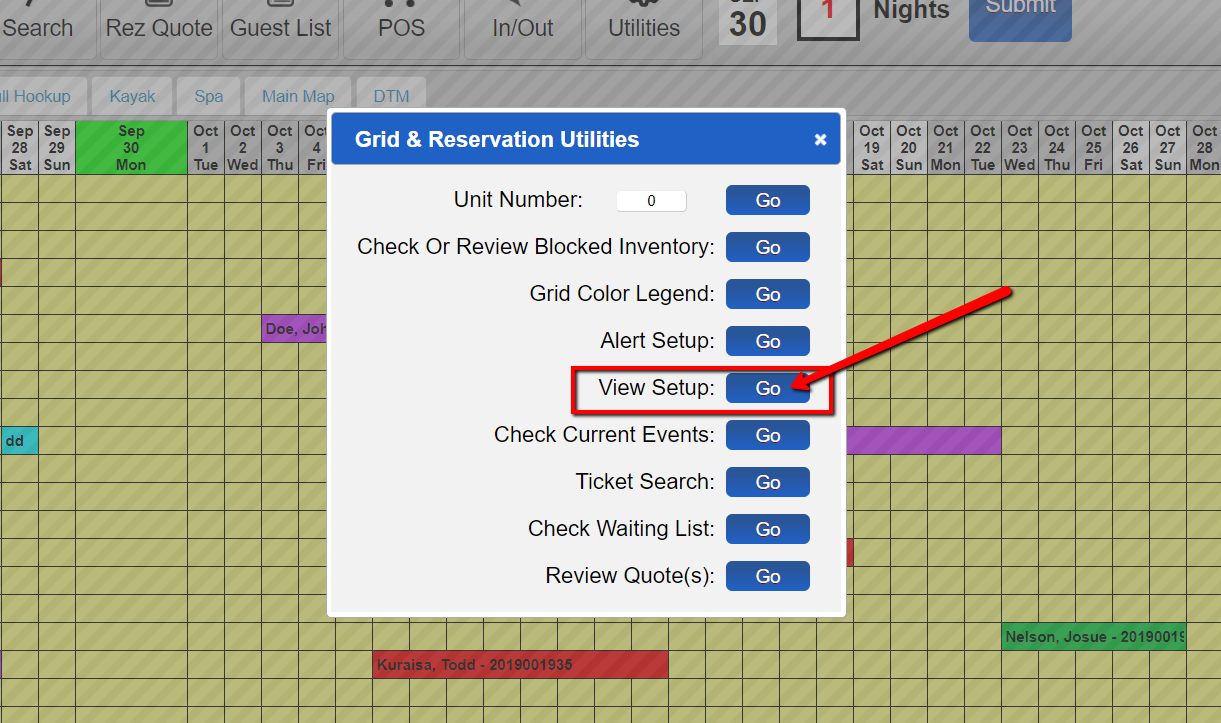
- Click View Setup
- Select the "View Setup" option.
-
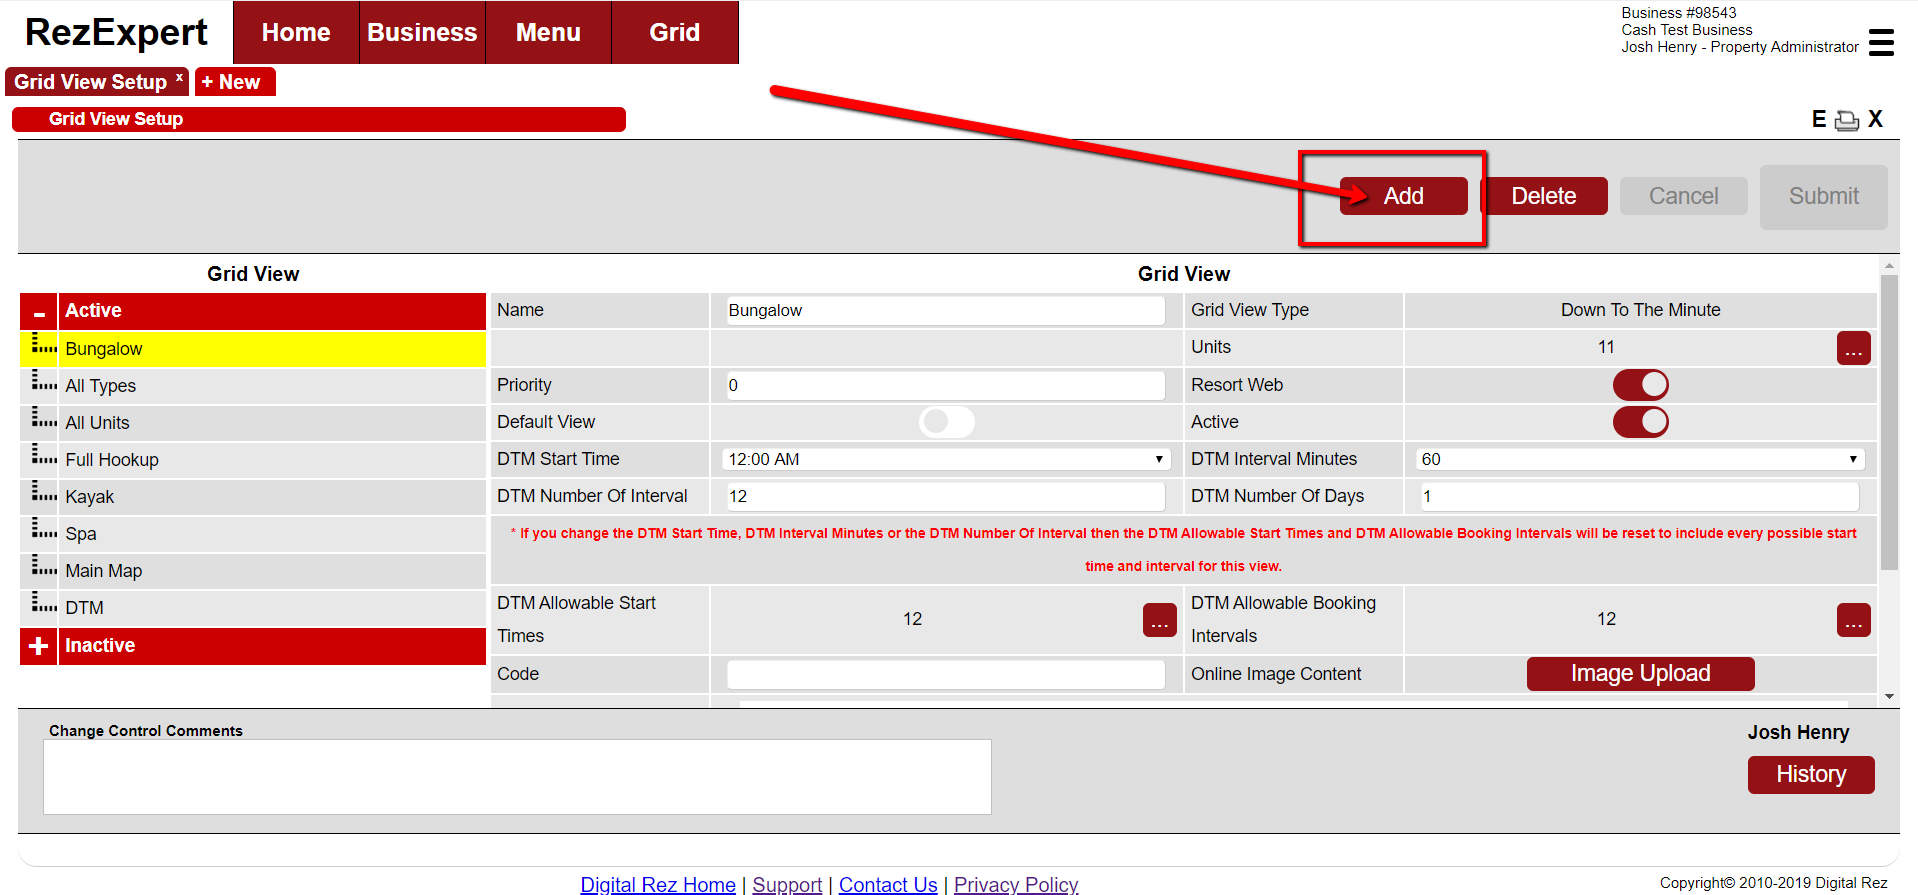
- Click Add
- Click on the "Add" button to start creating a new view.
-
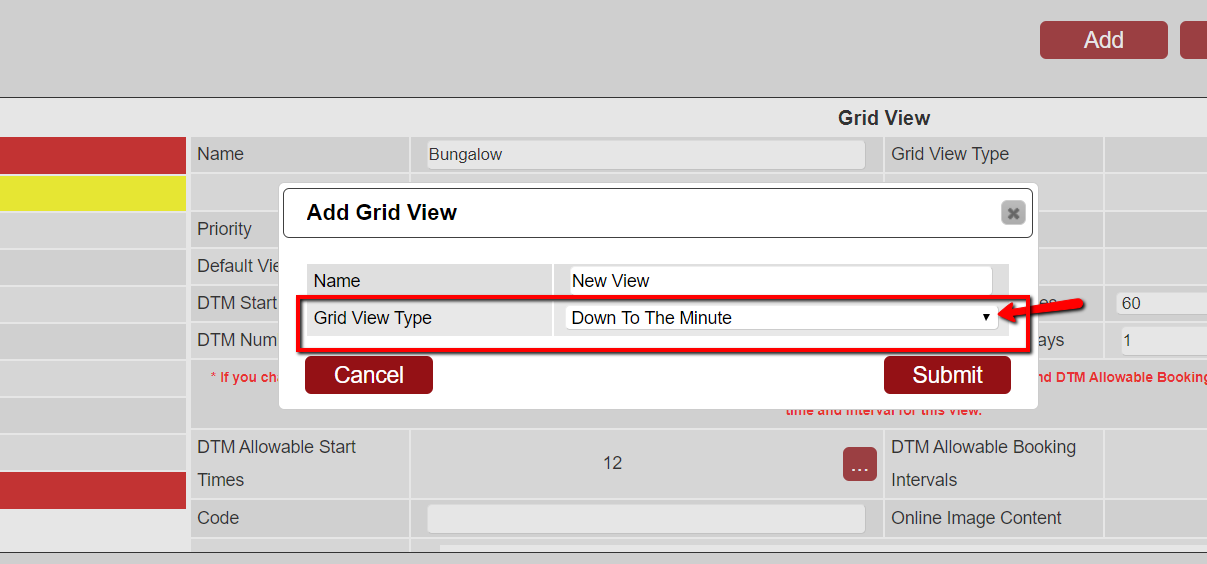
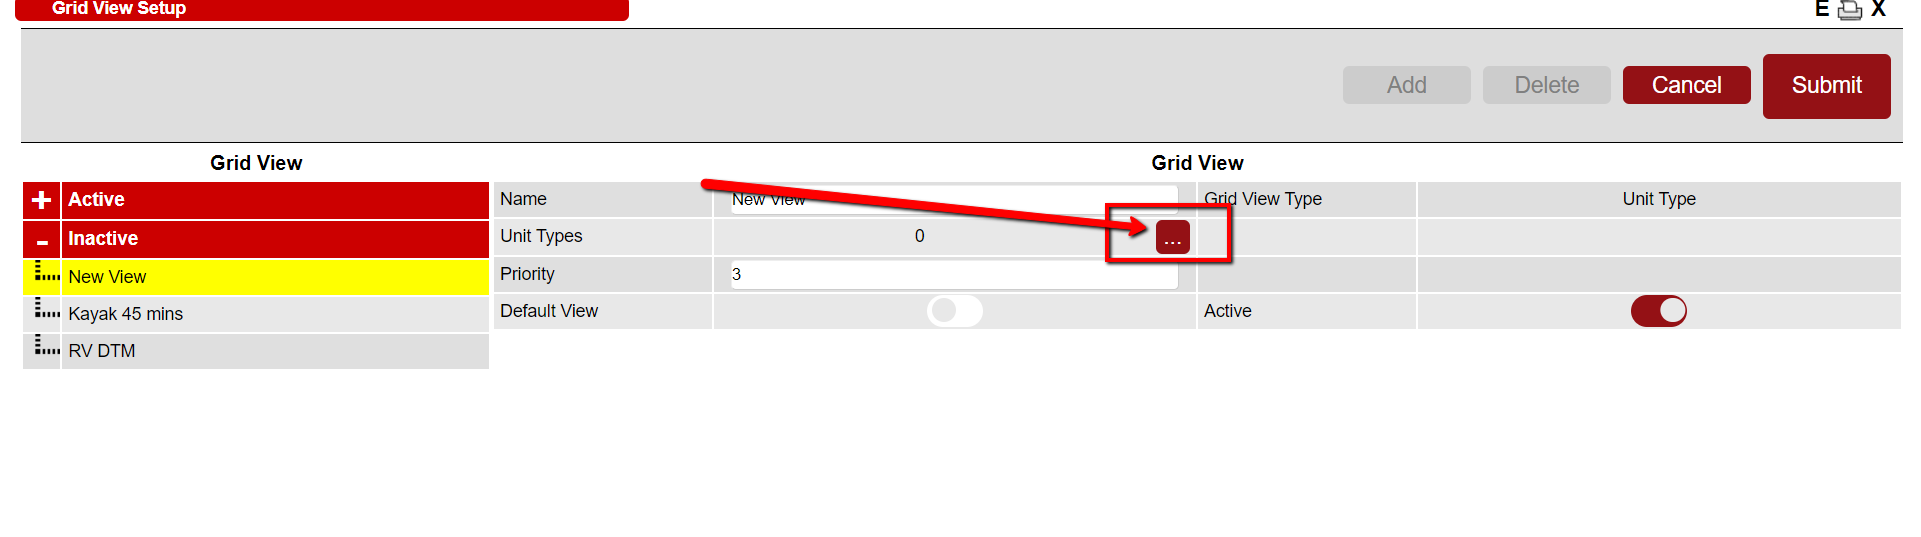
- Enter View Details
- Enter the name of the view.
- Select the appropriate grid view type from the dropdown menu.
-
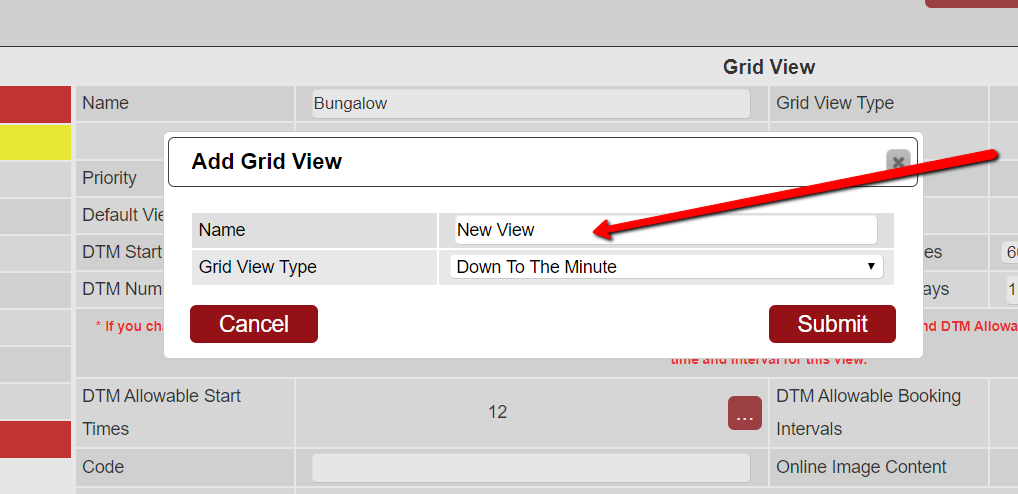
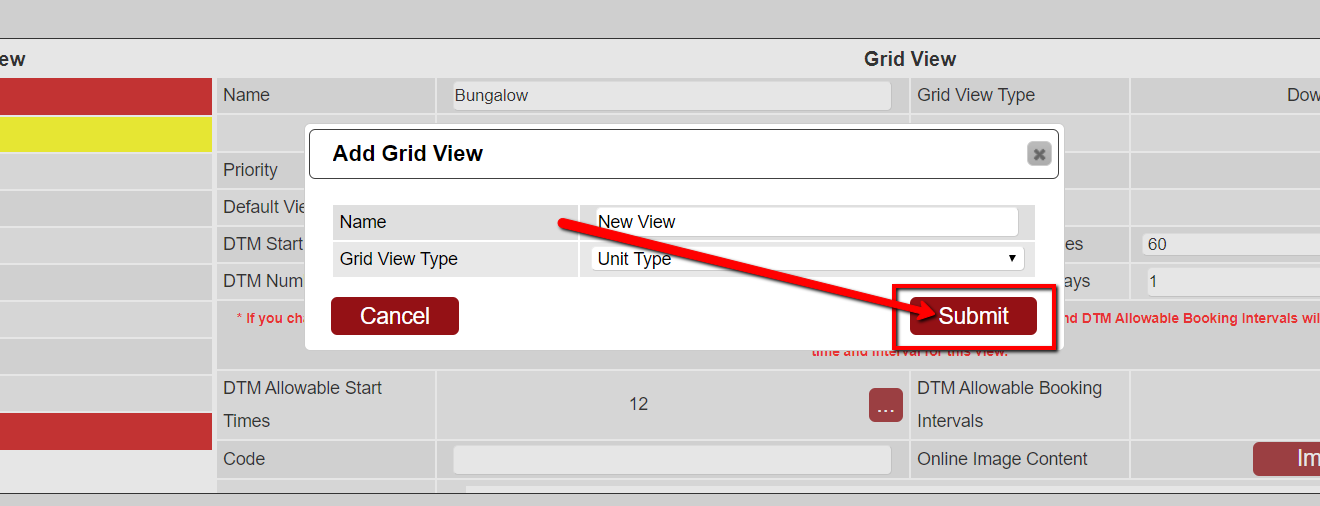
- Click Submit
- Submit the view details by clicking the "Submit" button.
-
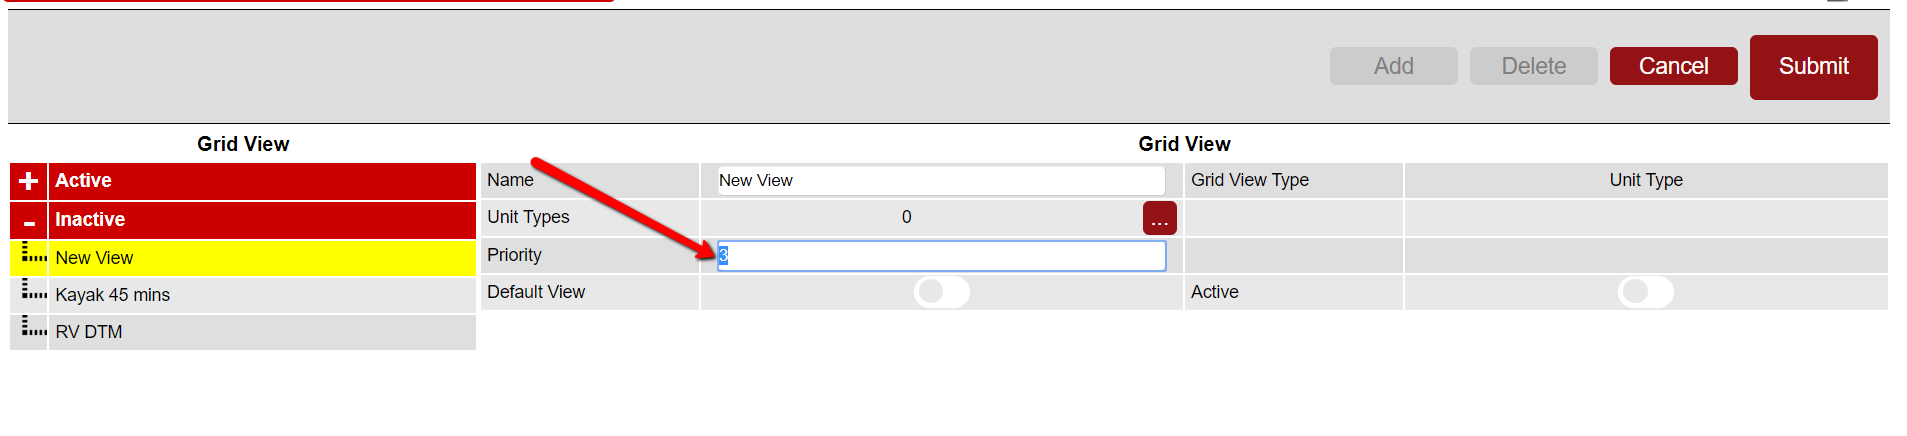
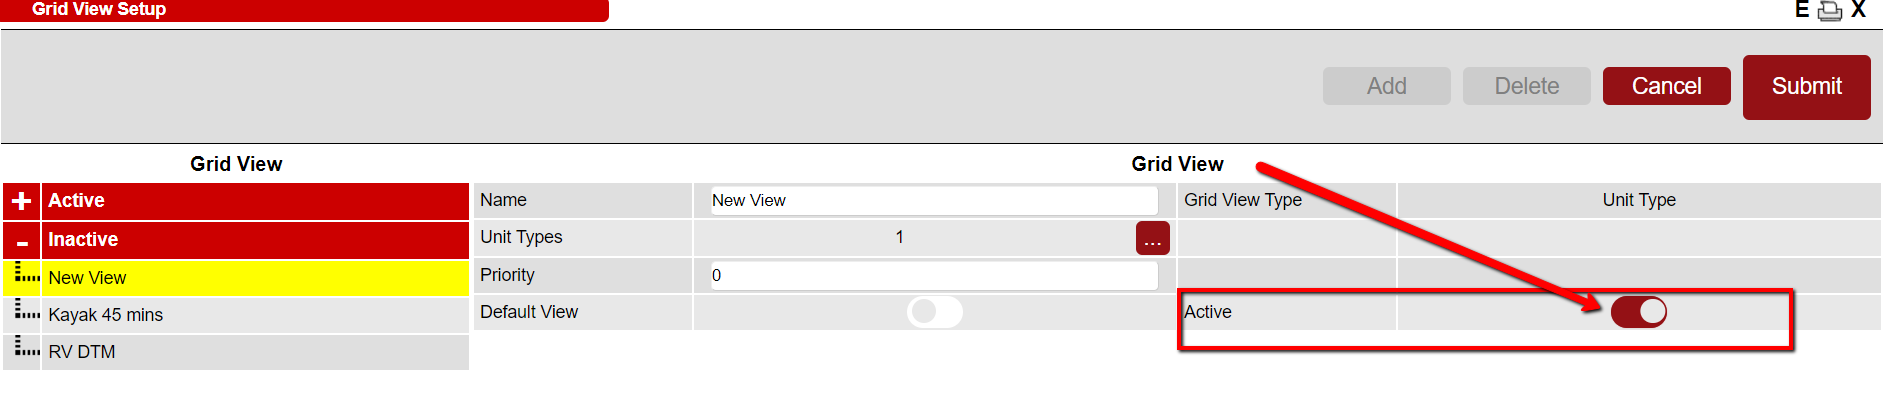
- Set Priority and Activate View
- Set the level of priority for the view.
- Activate the view by setting it to an active status.
-
- Add Change Control Comment
- Add a comment for change control purposes.
-
- Final Submit
- Click "Submit" to finalize the view creation.
Troubleshooting
- Ensure all fields are correctly filled before submitting.
- Verify that you have the necessary permissions to add views.