Accessing and Using the Account Manager
Last modified on:
Overview
When searching for the Account Manager for the first time, follow these steps.
Prerequisites
- Access to the Account Manager interface
Steps
Accessing the Account Manager
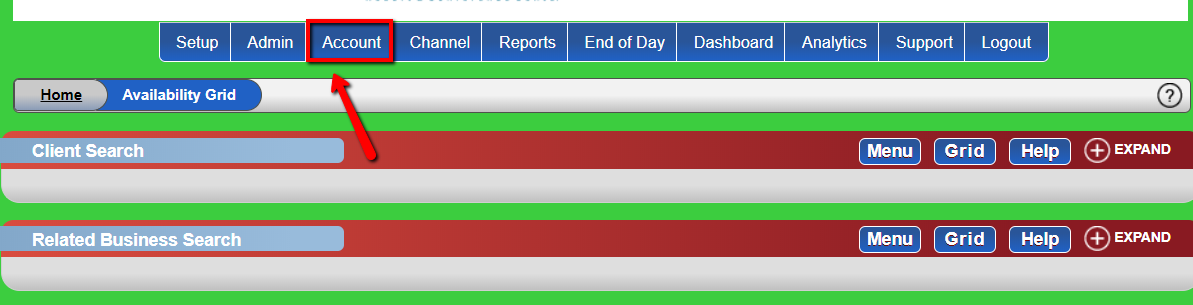
- Click Account.
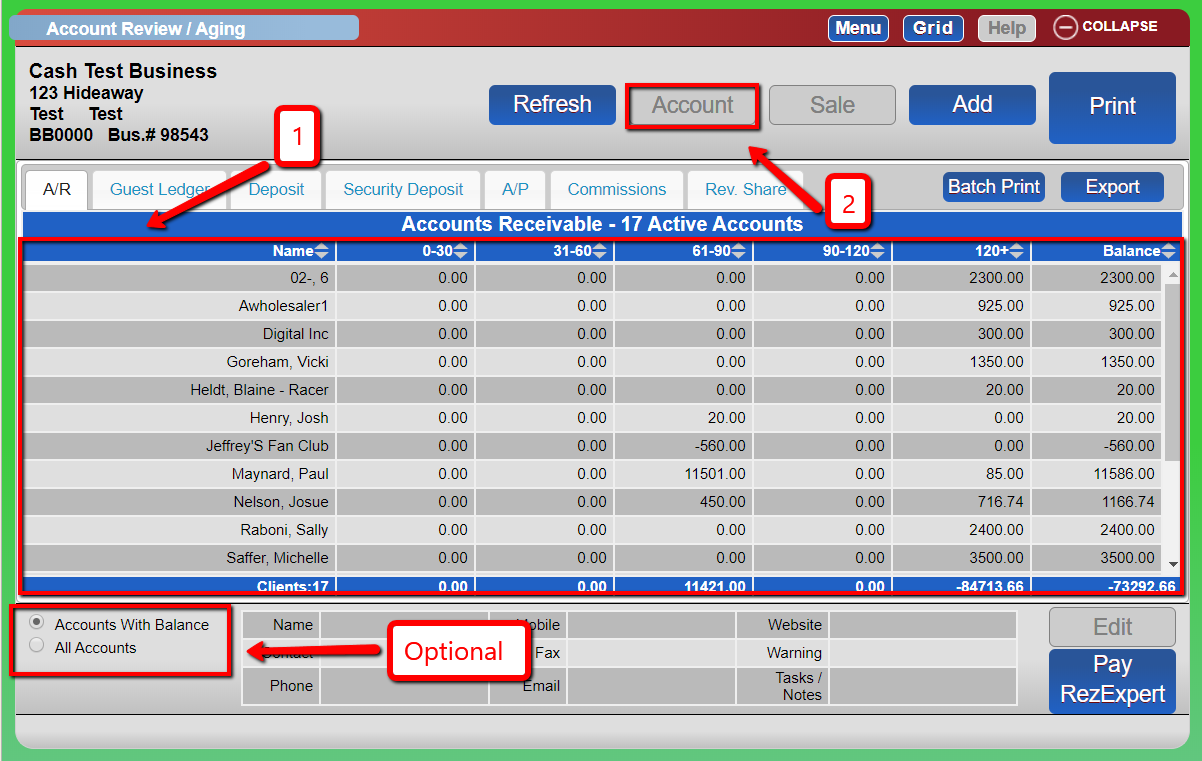
- The Account Review / Aging Panel will appear, showing all accounts with outstanding balances. By default, it opens to the A/R (Accounts Receivable) tab.
- To view all accounts, click All Accounts.
- To search for a specific account:
- Click on the desired account.
- Then click the Account button to open the Account Manager.
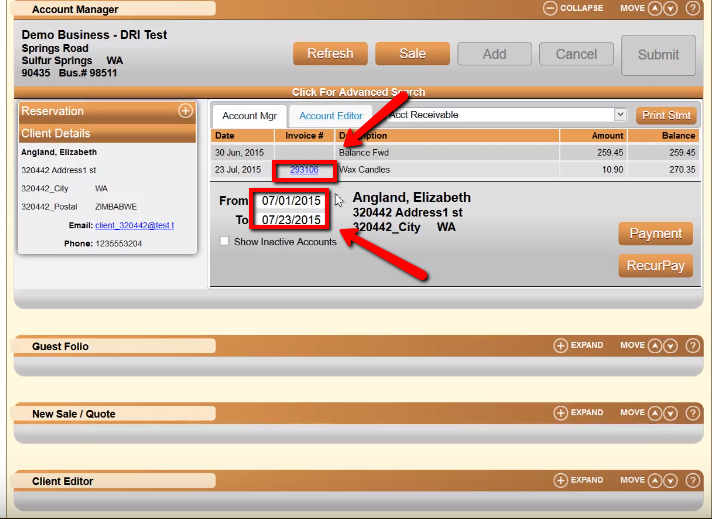
Account Manager Features
Viewing Account Details
- View Invoices: Click on any invoice hyperlink to view its details.
- Previous Invoices: Use the date selector to filter purchases by date.
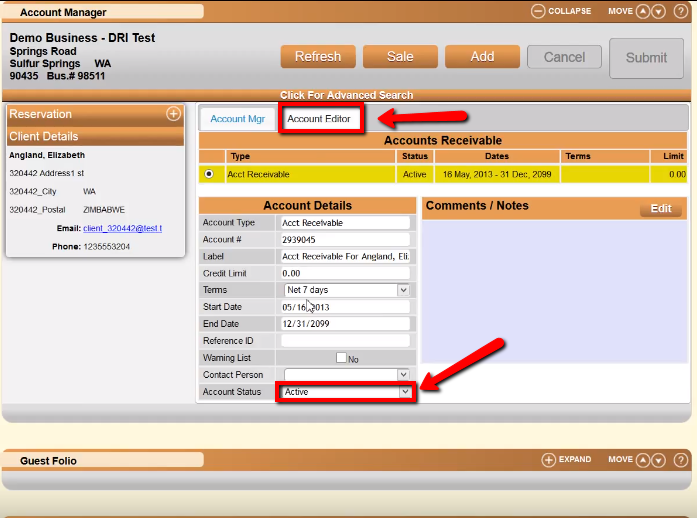
- Account Settings: Click Account Editor to update account settings.
- Set Account Inactive: If the balance is $0.00, you can mark the account as inactive.
Adding an A/R Account to a Client (If None Exists)
- Click For Advance Search.
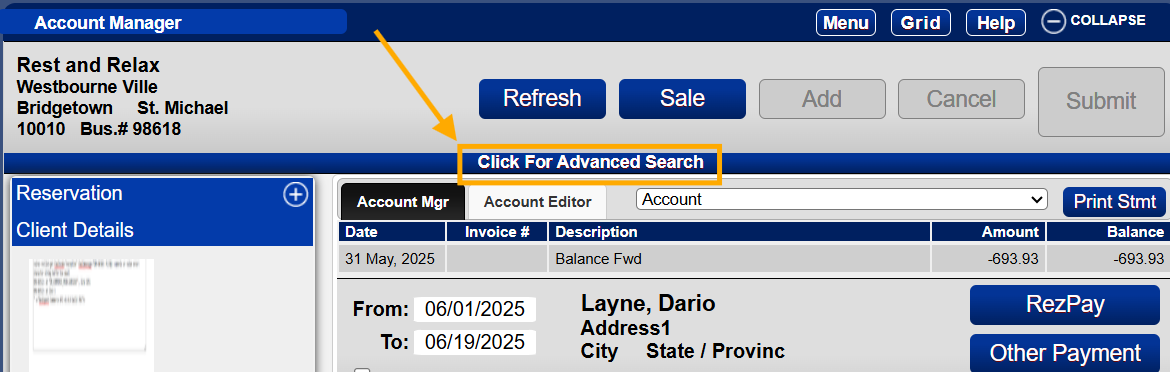
- Search and select the client.
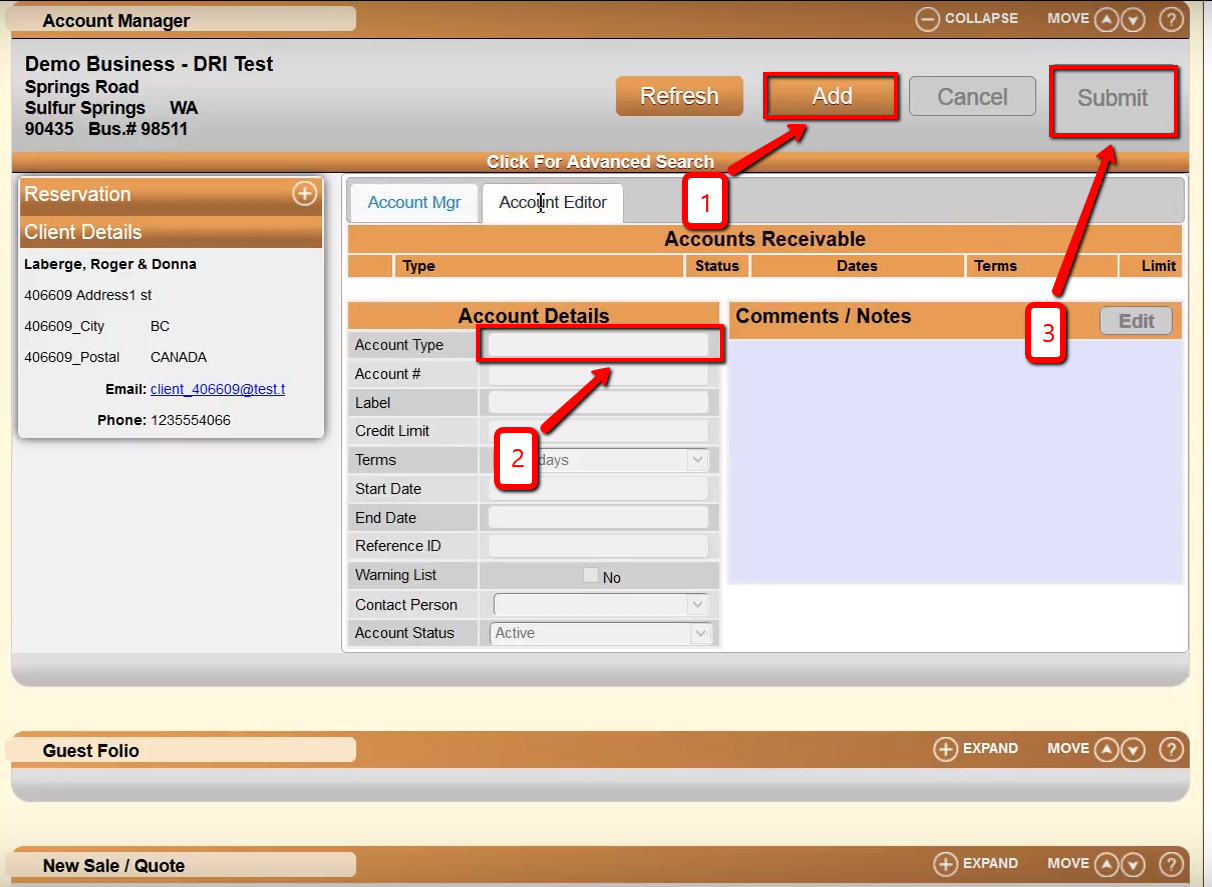
- Click the Add button.
- Select the appropriate Account Type.
- Click the Submit button.
Printing an Account Statement
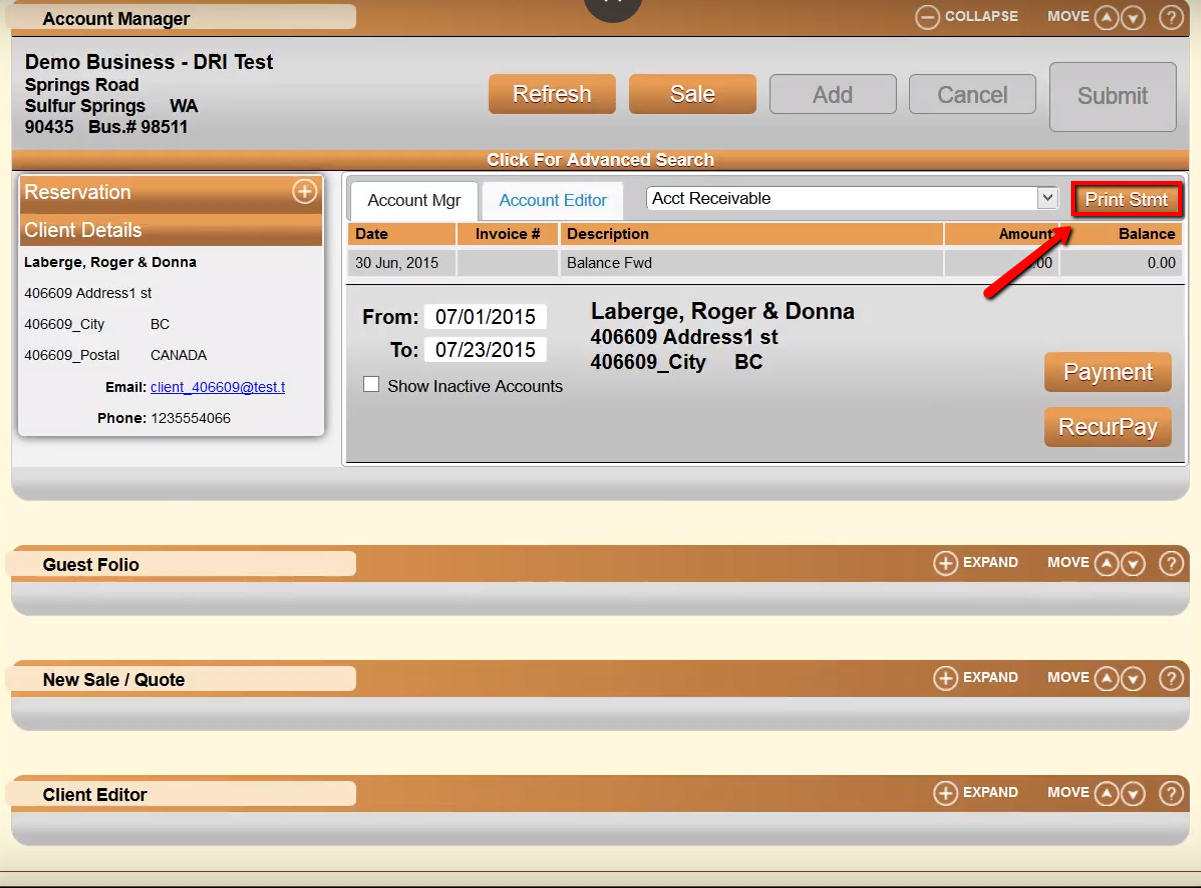
- Click the Print Stmt button.
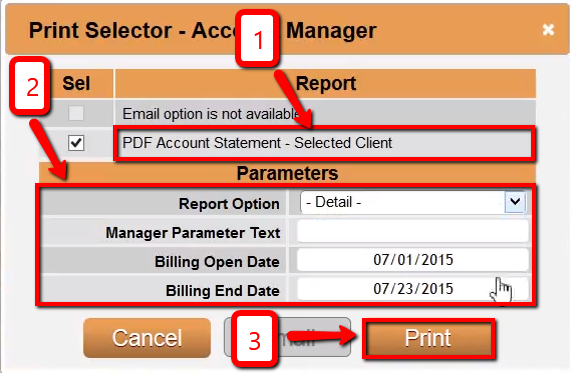
- Choose a report option, e.g., Client Account Statement.
- Set the report parameters.
- Click Print.
- Sales and payments can also be done within this panel.
Troubleshooting
- Ensure all steps are followed in sequence for successful access and operation.
- Verify account balances and settings before making changes.