Occupant Type Setup Instructions
Last modified on:
Overview
This document provides a step-by-step guide to creating an occupant type.
Prerequisites
- Access to the Setup tab in the application.
Steps
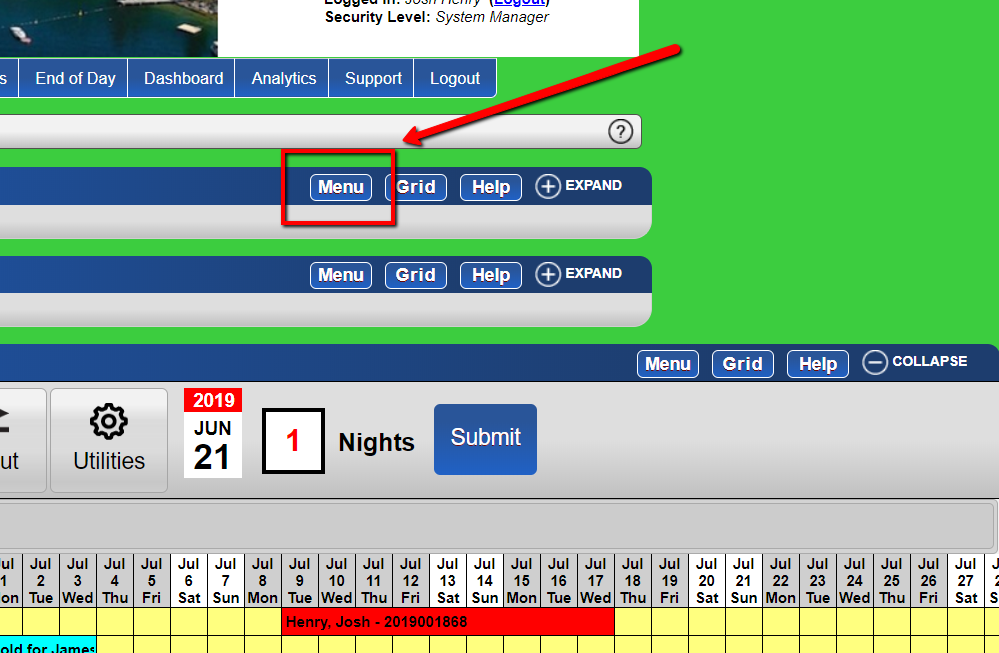
- Access the Menu
- Click on the Menu button.
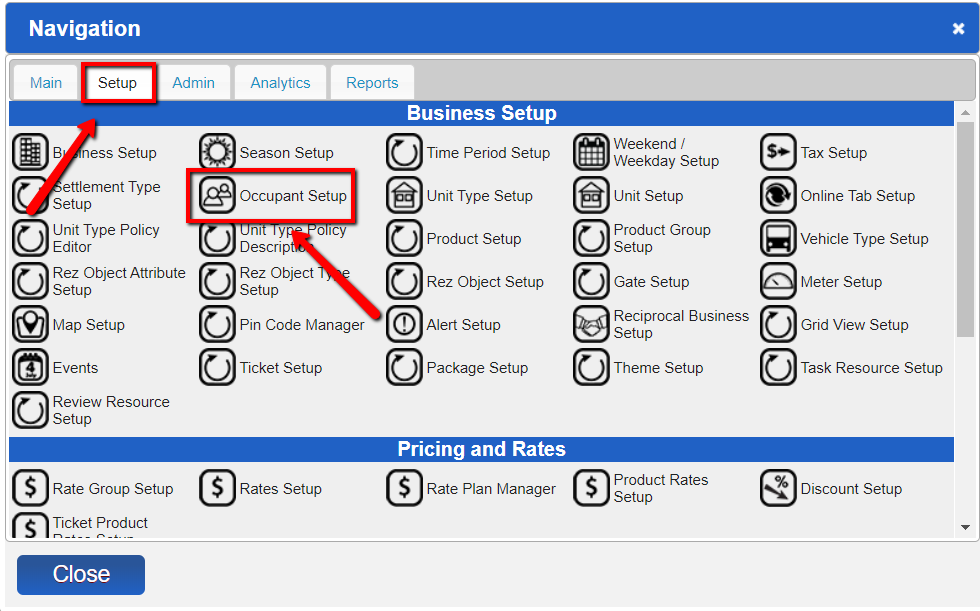
- Navigate to Occupant Setup
- Within the Setup tab, click on Occupant Setup.
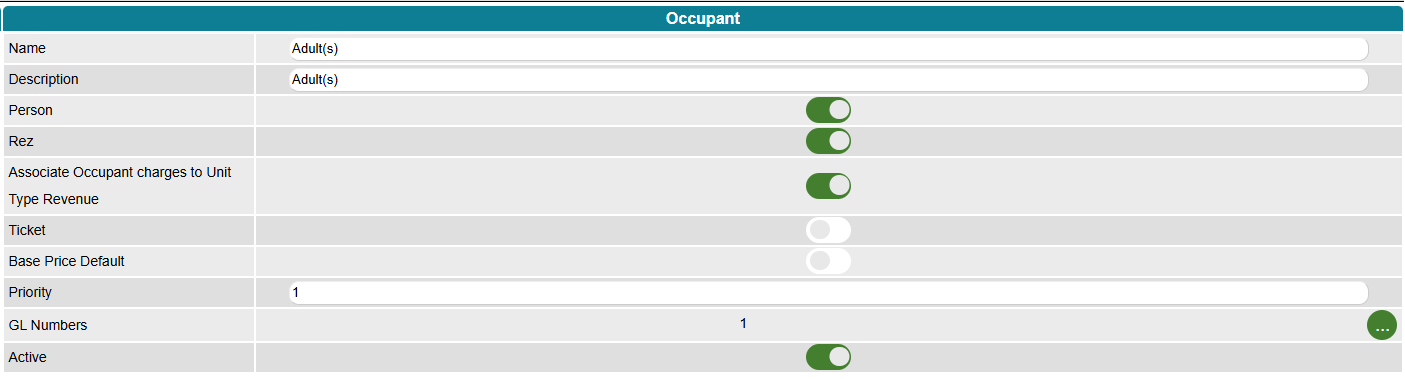
- Add a New Occupant Type
- Click "Add" to create a new occupant type.
- Set appropriate flags:
- Person: Tick the slider if the label represents a person (e.g., a pet does not).
- Rez: Make the occupant type available for reservations.
- Associate Occupant Charges to Unit Type Revenue: Tick the slider to associate additional revenue to the unit type. If not, revenue will be tracked separately.
- Ticket: Make this occupant type available to customers using tickets.
- Base Price Default: Tick the slider if a base count needs to be met before adding additional charges.
- Priority: Set the order of appearance.
- GL Number: Click on the circle to assign the required GL Code to the Occupant Type.
- Active: Tick the slider to make the occupant type active/available.
- Submit the Occupant Type
- Click "Submit".
- Note: Occupant Rates can be entered within Rates Setup.
Troubleshooting
- Ensure all required fields and flags are correctly set before submission.
- Verify that the occupant type is active if it does not appear in available lists.