Creating AR Accounts for Clients
Last modified on:
Overview
Account Receivable (AR) Accounts enable operators to transfer Reservation and POS charges to the account for future payment. There are two options for creating an AR Account for a client. Current reservations can have their balances transferred to Account Receivable, but an AR account must be created beforehand.
Prerequisites
- Ensure you have access to the Client Editor or Account Manager.
- Verify that the client has an existing reservation or POS balance to transfer.
Steps
Option 1: Client Editor
- Click on the Search button on the Availability Grid and search for the Client.
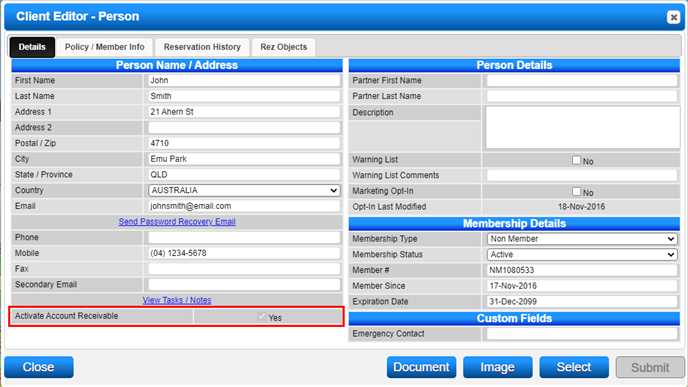
- Within the Selected Client box, click Edit to display the Client Editor record for the client.
- Tick the Activate Account Receivable flag and click Submit.
- An AR Account is now created for the client.
Option 2: Account Manager
- Click on Account within the Menu Bar to navigate to the Account Review/Aging panel.
- Click Add to go to the Account Manager panel.
- Enter the Client Name and click Search.
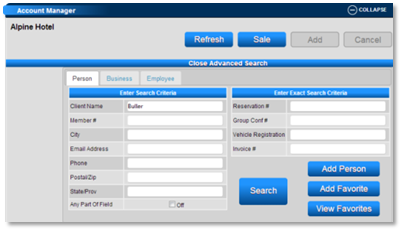
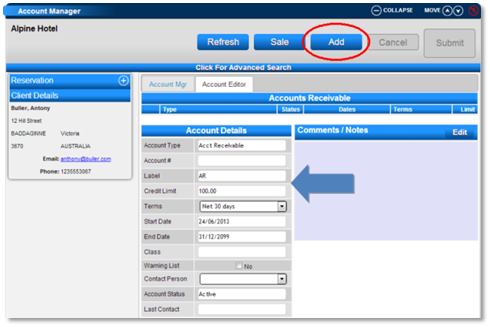
- After selecting the client, click the Account Editor tab within the Account Manager. Click Add to create a new account.
- Select Account Receivable from the Account Type dropdown.
- Enter the Account Details for the new account:
- Account # will be automatically generated after submitting.
- Credit Limit: Enter the desired limit for the account.
- Terms: Select the billing period.
- Press Submit to create the new account.
Reservation/POS Balance to AR Account
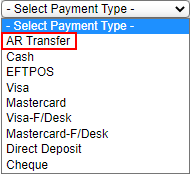
- For clients with an AR account, when paying a reservation or POS balance, the AR Transfer option is available in the Payment Type selection. Balances are transferred into the Account Manager.
- Payment and print options are available from the Account Manager.
Troubleshooting
For additional help, refer to the Help Document.