Payment Audit Panel Usage Instructions
Last modified on:
Overview
The Payment Audit panel provides a detailed breakdown of payments received and the associated product GL Description.
Prerequisites
- Access to the End of Day section, specifically within the Staff End of Shift and Final Daily Closure.
Steps
Location
- Navigate to the End of Day section.
- Access the Payment Audit panel by selecting it from the menu.
Displaying Tabs
The Payment Audit panel consists of two tabs:
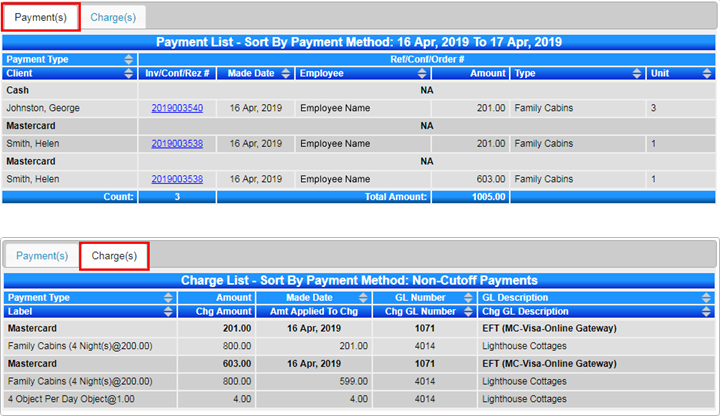
- Payment(s) Tab: Displays a breakdown of payments received and details attributed to the payments based on selected filters.
- Charge(s) Tab: Lists the products to which the payment has been allocated.
Note: Products will not display until deposits are converted to revenue prior to check-in.
Date Range
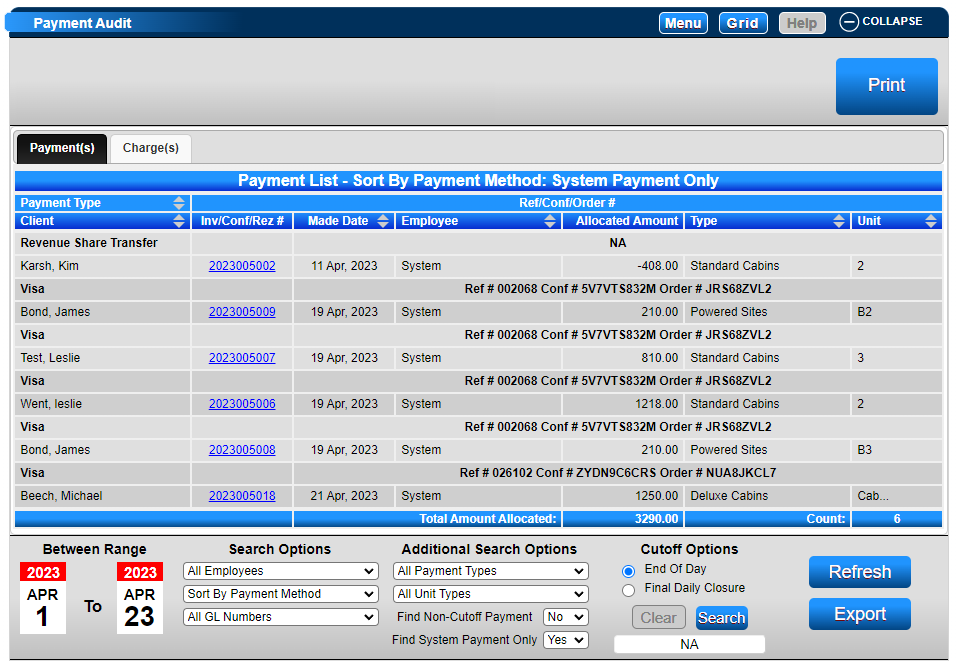
- The default date range is set from Yesterday to Today.
- Adjust the date range by clicking on the calendar and selecting the desired dates.
- Click "Refresh" to view transactions for the selected date range.
Note: The date range is limited to 31 days or less.
Search Options
To refine the displayed payments, use the following options:
- Employees: Select a specific employee (Default: All Employees).
- Sort Order: Sort by Payment Method or Employee.
- GL Numbers: Select a specific GL Code associated with the payment type (Default: All GL Numbers).
Additional Search Options
Further refine the displayed payments with these options:
- All Payment Types: Select a specific Payment Type (Default: All Payment Types).
- All Unit Types: Select a specific Unit Type to display payments allocated to it (Default: All Unit Types).
- Find Non-Cutoff Payment: Set to Yes to display payments not included in an End of Day Cutoff.
- Find System Payment Only: Set to Yes to display only System payments (e.g., online payments, Revenue Share Transfer).
Cutoff Options
- Use the Cutoff filter to search for payments based on the cut-off or Closure number.
- Click "Search" to find the required End of Day cutoff or Closure.
- Click "Clear" to reset the search.
Print and Export Options
- Click "Print" to print the All Payments report for the displayed payment data.
- Click "Export" to export the displayed payment data.
Troubleshooting
For additional help, refer to the Help Document.