Grid View Setup for Availability Management
Last modified on:
Overview
Grid View setup allows you to create custom view tabs for the Availability Grid.
Prerequisites
- Access to the Setup tab in the application menu.
- Access to the Utilities button for alternative navigation.
Steps
Location
- Click on a Menu button, select the Setup tab, and click on Grid View Setup.
- Alternatively, click on the Utilities button and click Go next to View Setup.
Default Grid Views
- All Unit Types: Displays each Unit Type's available inventory count.
- All Units: Displays all active Units and reservations.
Grid View Tabs
There are four options available:
- Unit Type: Displays the selected Unit Types and Availability numbers.
- Unit: Displays the selected Units and reservations.
- Map: Displays the selected uploaded map.
- Down to the Minute: Displays the Down to the Minute units and selected time intervals (Additional paid module).
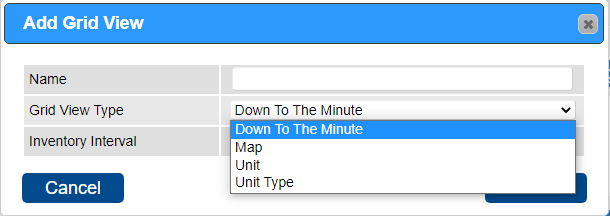
Adding a Grid View
- Click Add to create a custom Grid View.
- Name: Enter the label of the View tab.
- Grid View Type: Select the required Grid View type.
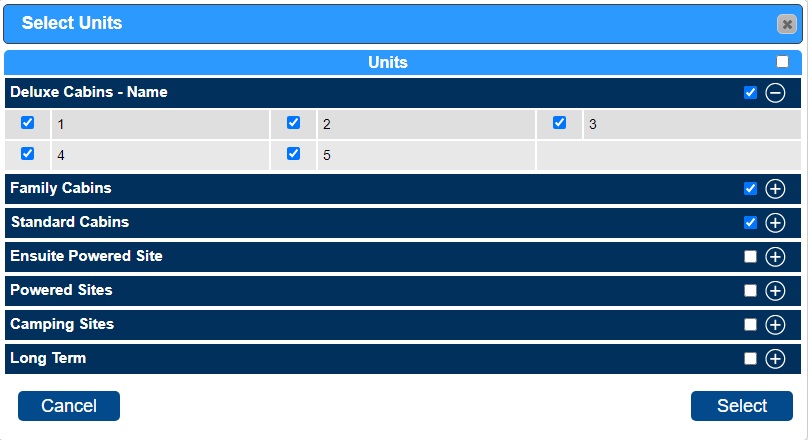
- Unit Type: Select the required Unit Type(s) to display.
- Unit: Select the required Unit(s) to display. If all Units within the Unit Type need to be selected, tick the box next to the Unit Type.
- Map: Select the required map to display.
- Down to the Minute: Select the required DTM Unit(s).
- Priority: Enter the order of appearance.
- Resort Web: Enable if the View tab is available for online bookings (DTM View tab only).
- Default View: Slide on for the View tab required as the Default tab when accessing the Availability Grid.
- Active: Slide on to make the View tab visible. Slide to deactivate when no longer required.
Configuring a DTM Grid View
- DTM Start Time: Select the start time of the view tab.
- DTM Inventory Interval: Select the inventory interval associated with the DTM Grid View/Unit Types.
- Code: For online booking widgets.
- DTM Number of Days: Enter the number of days to display.
- Online Image Content: Click Image Upload to upload images for the Online Grid View tab for the DTM Units.
- Description: Enter a description to display Online.
Note: Any adjustments to the DTM Start Time, Interval Minutes, or Number of Interval will reset the settings for DTM Allowable Start Time and Allowable Booking intervals to default. Ensure all settings are reviewed after adjustments.
Note: When additional Unit Types/Units are set up in RezExpert, they need to be added to the View Tabs.

Grid View Access
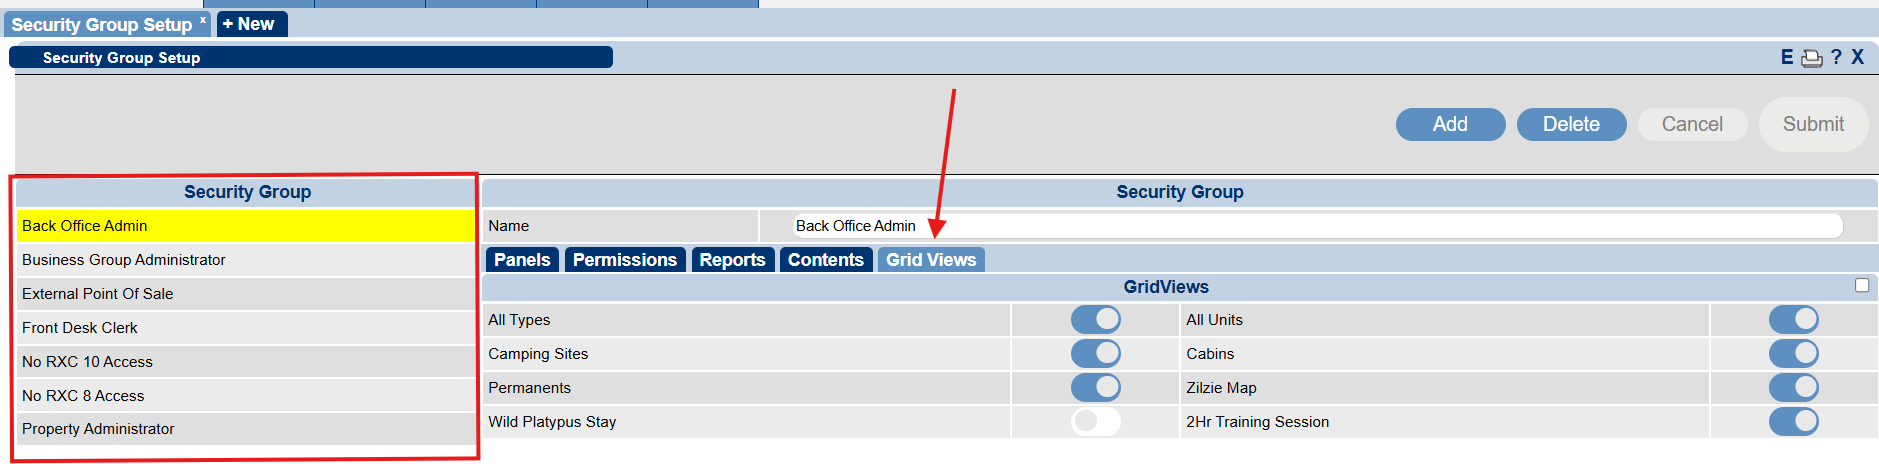
- Once a grid view is created, assign which security roles will have access to the Grid Views.
- Configure access from within the security Group setup:
- Menu => Setup => Security Group Setup
- Based on the Security Group selected, assign which roles can access which Grid Views.
Troubleshooting
- For detailed instructions, click here to print the Help Document.
- This video demonstrates how to setup views within RezExpert.