Booking Access Restriction Setup Instructions
Last modified on:
Overview
Create booking restrictions for peak periods of the year. Control the dates and times a guest can make a reservation during these peak periods. For example, Christmas bookings can be made from 9:00 AM on September 1st.
Prerequisites
- Access to the Admin tab in the menu.
- Ability to navigate to Rule Setup.
Steps
Location
- Click on the Menu button.
- Select the Admin tab.
- Click on Rule Setup.
Add
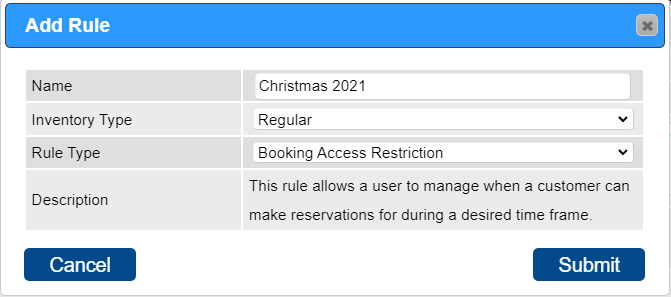
- Click Add.
- Enter a name for reference, e.g., Christmas 2019.
- Select Regular from the Inventory Type dropdown.
- Choose Booking Access Restriction from the Rule Type dropdown.
- Press Submit.
Booking Periods
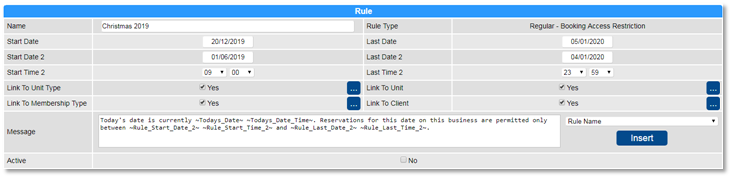
- Start Date: Select the start date for the period you wish to control booking creation, e.g., December 20th.
- Last Date: Select the last date for the period you wish to control booking creation, e.g., January 5th.
Booking Activity
- Start Date 2: Select the first date of the booking activity period, e.g., September 1st.
- Last Date 2: Select the last date, which can be the last date of the peak period.
- Start Time 2: Select the start time, e.g., 09:00 AM.
- Last Time 2: Select the last time, e.g., 11:59 PM.
Links
- Link To Unit Type: Apply the rule to selected Unit Types. Click the box to select the Unit Types for the rule. Untick the flag if the rule applies to all Unit Types.
- Link To Unit: If Unit Types are enabled, tick the Units.
- Link To Membership: Tick Non-Member if the rule applies to other Membership types. Tick the required Member Type.
- Link To Client: Search for selected Clients to apply the rule. Untick the flag if the rule applies to all clients.
Message
- Edit the message displayed when the rule is not met, if required.
- Once all settings are in place, click on the Active flag to activate.
Troubleshooting
Bookings
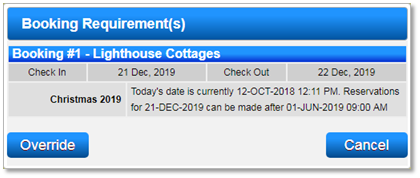
- Online Bookings: Any bookings that do not meet the rule will be advised.
- Console Bookings: Staff have the option to override the rule if required.
For additional help, click here to print the Help Document.